Copy/copy variation - 'SOP' how to test lenses after purchase?

Rightsaidfred

Veteran Member
Messages
2,962
Solutions
18
Reaction score
2,996
Dear forum community

In this forum, we quite often encounter lens quality discussions, like "do I have a bad copy of this or that lens?"
I recently noticed a certain decentration with my 55-200 mm 15 (!) months after purchase (see here) and now sent it to Fuji's repair center. Honestly speaking, I was a bit shocked that I never noticed before!! So "just go out and take pictures" may not be sufficient after having made a purchase.

It seems we can agree on the fact that there is a certain copy to copy variation (maybe within spec, maybe due to a QC issue) and that one is better off to do a few but thorough tests after purchase in order not to miss out the warranty period.

I wonder whether we could collect tips what tests to do?

Based upon possible lens issues,...
  • Decentration
  • Front/backfocus - is this a lens or a body issue?
  • ...
  • Usually, you are in lack of a benchmark. I mean you just have your own copy! Non-symmetrical issues like decentration are relatively easy to detect.
...let's answer the question how to test a lens without spending a tremendous amount of time and effort. Kind of an SOP one should follow in order to figure out whether one has a good or a bad copy.

What do you recommend?

Is it really necessary to buy test charts like Edmund Optics's or ISO 12233 or USAF 1951? Here's another recommendation I found in this forum. I certainly missed other important posts here. But it could help to just remember (cite) here.

Here's a proposal - please comment:
  • Most importantly, what is a suitable subject? I would say it depends on the FL. With a large FL (200 mm), I used a filigree tree that was about 300 m away and did pan shots to test all the four corners (see here). With smaller FL, this method is not appropriate. A billboard could be an idea (?)
  • Mount camera on a stable tripod
  • Switch off OIS
  • Set ISO at lowest value
  • Set aperture manually
  • Set jpeg quality to 'fine'
  • If you do a series (pan shot), focus only once at the beginning, then set to MF
  • Use ES to avoid any shock
  • Use remote shutter release or self timer; maybe even avoid a certain window of shutter speeds (1/60 through 1/250 s, cf. this thread + cited link)
  • No post processing, just use jpeg OOC
Comments, other opinions welcome!

BR,

Martin

https://500px.com/bachrocks
 
Last edited:
Careful brickwall shots can help. Use a tripod or just be sure you are shooting squarely at the brick wall. If your lens is exactly perpendicular to the center of your brick wall in the center of your image, the images can show you deviations from flatness of field. That is, sharpness will symmetrically vary across the image. If you are very lucky it will be exactly the same sharpness all the way across the image in any direction, but usually sharpness will drop off symmetrically around the center of the image field.

If you have consistent issues of uneven sharpness, and they don't change with lots of samples you could have a decentered lens.

There are other methods out there, and those will be more definitive.

Some lenses do not have flat fields under any conditions but most aspheric optics correct for it and should be able to show you flatness of field.

Good luck!
Thanks Tom. Yes, good idea. I know the brick wall test and did it in the past to check my 9 mm Laowa lens (that passed the test :-)).

Missed it with my XF 55-200 mm. Cannot catch up now to check whether the 'not-super-bad-but-still-significant' decentration would show up there because I already sent my lens to Fuji's repair center.

Instead, let me show the photo where I first noticed a certain decentration, 15 months after purchase:

Fujinon XF 55-200 mm, 200 mm, Fujifilm X-T20, SOOC. Handheld. OIS was on.

Fujinon XF 55-200 mm, 200 mm, Fujifilm X-T20, SOOC. Handheld. OIS was on.

Sane photo, bottom left , 400 px * 400 px. Clearly weaker than bottom right.

Sane photo, bottom left , 400 px * 400 px. Clearly weaker than bottom right.

Same photo, bottom right, 400 px * 400 px

Same photo, bottom right, 400 px * 400 px

Light was low, OIS was on, no tripod etc. I thus followed up with my systematic 'tree test' and confirmed the weakness mainly in the bottom left corner. Hope they're able to fix it.

BR,

--
 
I do this way https://www.lensrentals.com/blog/20...ntered-lens-an-old-technique-gets-a-makeover/

No need to pixel peep. It takes like 15s so you can do it easily when you buy a used lens.
Thanks tokumeino.

Maybe I am wrong, but I find this Zeiss modified Siemens star chart a bit small, and such charts do not cover the corners of the image frame, just the center.

I fully agree on not starting to peep pixels. Franz Beckenbauer, a famous German soccer trainer said to his team of professionals "geht's naus und spuit's Fuaßboi" which is Bavarian for "hey go out and play soccer."

But on the other hand, we spend a lot of bucks on our glass and all the posts here on copy variation and my own experience suggest that you're really better off to spend a bit of time in a significant test before (ideally) or after (within warranty period) purchase.

M..maybe I really spend the $40 and go for the Edmund's (see also here ). This is 36" x 24", i.e., 91 cm x 61 cm and really looks good to me because it is (i) large and (ii) has a pattern in the corners. Or, even simpler and at almost no cost, why not use the DIY version: print the 1951 USAF chart five times (center + corners) and stick to a wall?

Cheers,

--
https://500px.com/bachrocks
 
Last edited:
I do this way https://www.lensrentals.com/blog/20...ntered-lens-an-old-technique-gets-a-makeover/

No need to pixel peep. It takes like 15s so you can do it easily when you buy a used lens.
Thanks tokumeino.

Maybe I am wrong, but I find this Zeiss modified Siemens star chart a bit small, and such charts do not cover the corners of the image frame, just the center.

I fully agree on not starting to peep pixels. Franz Beckenbauer, a famous German soccer trainer said to his team of professionals "geht's naus und spuit's Fuaßboi" which is Bavarian for "hey go out and play soccer."

But on the other hand, we spend a lot of bucks on our glass and all the posts here on copy variation and my own experience suggest that you're really better off to spend a bit of time in a significant test before (ideally) or after (within warranty period) purchase.

M..maybe I really spend the $40 and go for the Edmund's (see also here ). This is 36" x 24", i.e., 91 cm x 61 cm and really looks good to me because it is (i) large and (ii) has a pattern in the corners. Or, even simpler and at almost no cost, why not use the DIY version: print the 1951 USAF chart five times (center + corners) and stick to a wall?

Cheers,
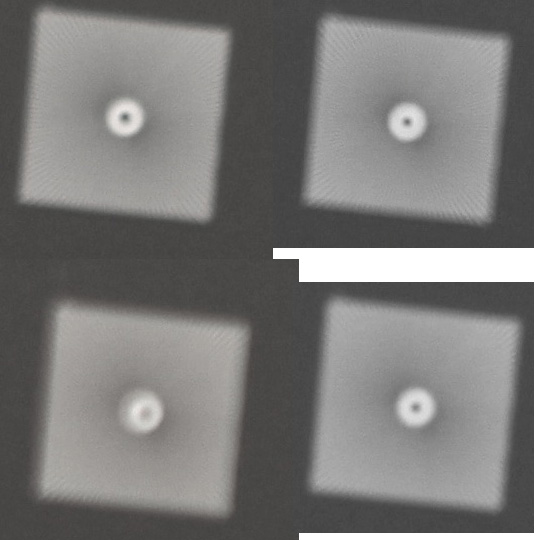
I've done all that as well (USAF charts and such). And I use them if I'm curious enough to compare sharpness of several lenses. But with charts, you can pin anything on a wall, the most difficult part is to get the camera properly aligned. I do it with a small mirror in the center of the chart ; others such as Jerry use a pin. At the end, centering is remains difficult to evaluate this way and it needs such a careful setup that you most likely will misinterpret a slight blur as a decentering issue while it is only a mismanipulation (or misfocus sometimes).

I beleive that you didn't read the whole article I've pointed : https://www.lensrentals.com/blog/20...ntered-lens-an-old-technique-gets-a-makeover/ and that you didn't understand the point. With the above technique, you only test for centering, not for anything else. And you don't care at all about the corners : all you have to look at is the center circle, once slightly out of focus : you do need to defocus to test, so you obviously don't test sharpness.

 You don't evaluate sharpness, but rather look at the shape of the circle, once slightly defocused

You don't evaluate sharpness, but rather look at the shape of the circle, once slightly defocused

You can perform the test very quiclkly, with the manual focus zoom for instance, and even without actuating the shutter : live on the screen or EVF. It is really a matter of seconds and doesn't require a careful setup : alignment is not critical, nor is even lightning. When I buy a used lens and I meet a seller on the street, for instance (same when buying a new lens in a shop), it takes me no longer than 15s to evaluate for centering. This technique has prevented me to buy a couple of decentered lenses, so without even needing to get back home and consider a return.

I'd add that in my experience, each time I had a well centered lens, it used to behave as it should. My 16-80 copy is trully exellent for instance, and it is indeed perfectly centered : I've ensured that by quickly testing the sample in the shop before even paying. By contrast, you won't use an USAF chart in a shop or in the street !! Back home, my copy used to prove very sharp, as expected. In addition, every time I've had a sub-par copy (my 18-55 was not great for instance even if the issue was not like one side always more blurry as expected with decentering), I could see a slight decentering with this technique.

So I'm inclined to beleive that as far as centrering is concerned, this technique is both more reliable and much easier.

I have a proper modified Zeiss chart, but I'm convinced that given the nature of the test, a custom print would do just as well.

metric


metric


metric
 
Last edited:
(...)

Thanks tokumeino for the in-depth explanation. No worries, I had done my homework and understood the article. I've already used such a self printed Zeiss/Siemens chart some longer time ago when I bought a Laowa lens, and the chart is still there, in one of my drawers. Just was too careless with my XF 55-200 mm.

You're right, the Zeiss/Siemens chart is easier to handle when it comes to camera alignment as well as practicability in a photo shop.

As a summary, we now have the following quick tests:
  1. Zeiss/Siemens star chart, buy or print one hardcopy, just focus/defocus and watch on screen/EVF (super fast, perfect in a selling situation) - see here in this thread
  2. USAF 1951 chart or similar, print 5 hardcopies (for center + corners), stick to wall, take pictures and analyze (a bit more effort, maybe the better test to discover an only slight decentration (?), still relatively fast but definitely needs more time + download of jpegs from camera). See here and there in this thread.
  3. For large FL, the I still consider 'filigree tree quick test' as not too bad (see here)
When it comes to alignment of the camera vs the charts, I think it is not that big a problem. Just play a bit statistics, particularly, if really a lens issue seems to appear, with multiple realignments of the tripod/camera. This is what I did with my 'tree test'. I repeated it at least 5-6 times. It was so simple, and the results were 100 % consistent.

-----
Here's an update on alignment of camera vs test charts:

-After playing around with DIY prints, I came to the conclusion that you need an exact 3:2 frame outline on the chart (e.g., a drawn line, or the outline of the chart itself) with exact 90° angles. Only this will make sure that your alignment is good, and it really needs to be!

-The alignment requirement is not so strict with the Zeiss/Siemens star chart. This is a really fast test.
-----

If anyone has another good quick test, let us know.

Cheers,
 
Last edited:
Based on this picture, I would not say this lens is conclusively decentered.

You are shooting at 200mm with 125th of a second which could already be a problem. I would say the image in general isn't incredibly sharp anywhere, since everything is pretty much at the edge of the image.
Also at 200mm, the 55-200 is known to be at its weakest.

You really need to find a proper static subject and make sure it is at least somewhat parallel to the sensor.

The good old bookshelf test would do, or find a wall with some grafitty on it for a test. I have one nearby that was commissioned to be painted by a few street artists and it makes a great test subject.

Landscapes are almost never useful for this kind of stuff unless you have a REALLY bad copy.
 
Careful brickwall shots can help. Use a tripod or just be sure you are shooting squarely at the brick wall. If your lens is exactly perpendicular to the center of your brick wall in the center of your image, the images can show you deviations from flatness of field. That is, sharpness will symmetrically vary across the image. If you are very lucky it will be exactly the same sharpness all the way across the image in any direction, but usually sharpness will drop off symmetrically around the center of the image field.

If you have consistent issues of uneven sharpness, and they don't change with lots of samples you could have a decentered lens.

There are other methods out there, and those will be more definitive.

Some lenses do not have flat fields under any conditions but most aspheric optics correct for it and should be able to show you flatness of field.

Good luck!
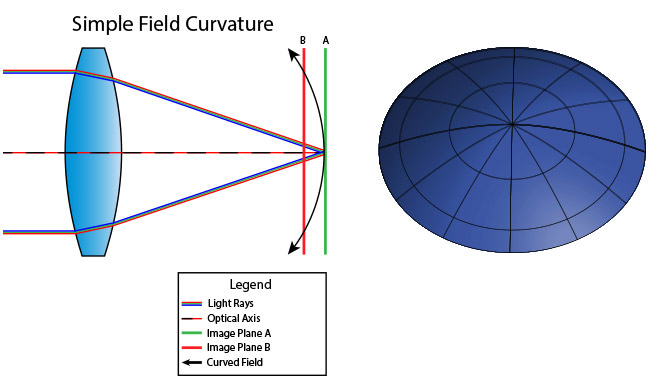
Actually no lens has a flat field since light radiates in a sphere - it is the physics of a lens. The physical term for it is Petzval field curvature. Multiple elements and special aspherical lens elements are required to produce a flat field.

There are very few lenses with an MTF that does not fall off toward the edge. Two examples come to mind, enlarger lenses and copy lenses which are highly specialized.

Flat field is not always necessary. If you don't print to display in a 2x3 aspect ration but say 4x5 or even square - the don't worry about the corners. Even lens that are designed to be "Planer" can only achieve that at one focal distance.

Also the use of exotic elements to design a planer lens can result in field curvature that is not spherical which is worse.

One can catch major issues with the lens by self testing such as decentering or bad alignment. However, to really understand if your lens is "bad" you need to compare it to the MTF curves for the lens design. A lot of lens are probably well in spec based on the MTF of the design but may not be acceptable to the user. In that case the lens isn't bad - the selection of the lens for the intended use was bad.


The real solution for field curvature is not the lens but a curved sensor.
 
Based on this picture, I would not say this lens is conclusively decentered.
You are shooting at 200mm with 125th of a second which could already be a problem. I would say the image in general isn't incredibly sharp anywhere, since everything is pretty much at the edge of the image.
Also at 200mm, the 55-200 is known to be at its weakest.

You really need to find a proper static subject and make sure it is at least somewhat parallel to the sensor.
The good old bookshelf test would do, or find a wall with some grafitty on it for a test. I have one nearby that was commissioned to be painted by a few street artists and it makes a great test subject.

Landscapes are almost never useful for this kind of stuff unless you have a REALLY bad copy.
Hi ragbasti

Couldn't agree more!

Please let me emphasize again: this landscape was not my test picture. It was only the picture when I first became suspicious!

What I then did was my 'filigree tree test ' or how you may call it. This test and all its repetitions confirmed a non-symmetrical behavior my copy of the 55-200 mm at 200 mm, i.e., a decentration (not massive but significant).

I am fully aware of the fact that this test is not a scientific one either. But I think the tree test is not so bad with large FL because the issue of parallel orientation of camera vs chart/subject simply does not apply.

The idea of his thread is about non-scientific quick testing of lenses everyone is technically able to do at home or even in a selling situation (see tokumeino's contribution).

Meanwhile I bought a test chart (B.I.G. RES7) and will try it with all my lenses at the weekend, during daylight. Something like allemania did here .
 
Last edited:
For a variety of reasons - some professional scientific - I've been testing optics for a long time. Have a few things to add to this I hope are helpful. For significant defects, & they do happen to all makers, testing is pretty easy. Bought a used XF10-24 & a simple brick wall test showed it was badly decentered - returned it.

I do astro landscapes so regularly use star images to check for decentering & lens tilt. Every prime lens I own (Sam 12mm f2, XF16, XF23 f1.4, XF56, XF90) shows a bit of decentering/tilt wide open but would probably be considered w/in spec if sent back to Fuji.

I also use the Edmonds chart & have tried the white hole reinforcers on black paper test. Have found the later requires a significant amount of decentering to show a problem - YMMV.

Recently thought I'd check my XF23 using the Edmonds chart even though I know it is a bit decentered. Set up was as well aligned camera to chart as practical. Focused carefully in the center. That test showed the right side was a bit softer than the left. Problem is star images show the opposite side is softer. This lens has only slight decentering in the usual one corner is worse that the others definition this thread has been considering. I conclude that the resolution chart test is not especially sensitive to the soft corner approach UNLESS great care is taken w/ alignment & focus. As an aside, I met one of the owners of Optical Limits review site. In our discussion, he reported how many hundreds of images they take just to be sure they've nailed the focus at each aperture. In spite of my care, my focus on a flat chart was different from my focus on stars probably because I focused in a different area.

Something a resolution chart w/ lines perpendicular to each other can detect is astigmatism - one set of lines is sharp the other direction less so. Astigmatism is another aberration that can be caused by decentering/tilt. The XF23 has 18% astigmatism - a lot. Stars are little arrowheads rather than round. Inspect test images around the edges wide open w/ no sharpening or NR applied. Look for this.

Astigmatism: Look for horizontal lines blur before vertical or the reverse.

Astigmatism: Look for horizontal lines blur before vertical or the reverse.

I suggest testing for astigmatism as well as soft corners/sides should be part of an SOP for new lenses. To be confident about astigmatism tests, have to be sure there is no vibration. At longer FL, people walking near by on the ground & especially floors can cause vibration in a tripod. Avoid shutter shock & wind.

Haven't bought a Ziess chart but will now. But I suspect star images are the toughest test for decentering of all.
 
Last edited:
For a variety of reasons - some professional scientific - I've been testing optics for a long time. Have a few things to add to this I hope are helpful. For significant defects, & they do happen to all makers, testing is pretty easy. Bought a used XF10-24 & a simple brick wall test showed it was badly decentered - returned it.

I do astro landscapes so regularly use star images to check for decentering & lens tilt. Every prime lens I own (Sam 12mm f2, XF16, XF23 f1.4, XF56, XF90) shows a bit of decentering/tilt wide open but would probably be considered w/in spec if sent back to Fuji.

I also use the Edmonds chart & have tried the white hole reinforcers on black paper test. Have found the later requires a significant amount of decentering to show a problem - YMMV.

Recently thought I'd check my XF23 using the Edmonds chart even though I know it is a bit decentered. Set up was as well aligned camera to chart as practical. Focused carefully in the center. That test showed the right side was a bit softer than the left. Problem is star images show the opposite side is softer. This lens has only slight decentering in the usual one corner is worse that the others definition this thread has been considering. I conclude that the resolution chart test is not especially sensitive to the soft corner approach UNLESS great care is taken w/ alignment & focus. As an aside, I met one of the owners of Optical Limits review site. In our discussion, he reported how many hundreds of images they take just to be sure they've nailed the focus at each aperture. In spite of my care, my focus on a flat chart was different from my focus on stars probably because I focused in a different area.

Something a resolution chart w/ lines perpendicular to each other can detect is astigmatism - one set of lines is sharp the other direction less so. Astigmatism is another aberration that can be caused by decentering/tilt. The XF23 has 18% astigmatism - a lot. Stars are little arrowheads rather than round. Inspect test images around the edges wide open w/ no sharpening or NR applied. Look for this.

I suggest testing for astigmatism as well as soft corners/sides should be part of an SOP for new lenses. To be confident about astigmatism tests, have to be sure there is no vibration. At longer FL, people walking near by on the ground & especially floors can cause vibration in a tripod. Avoid shutter shock & wind.

Haven't bought a Ziess chart but will now. But I suspect star images are the toughest test for decentering of all.
Hi tradesmith45

Many thanks for your recommendations.

A star photo (we can call it the 'astro test') will be a bit more effort (not that quick a test) for those living in a city, but anyway, it may be a good recommendation! May I ask you for a few standard parameters for those not skilled in the art of star photos? Aperture, ISO, ss etc. What is the 'minimum requirement' for such a photo if you do it just for testing purpose (no need to look nice), also in terms of surrounding light, 'light pollution'?

I guess the astro test is more suitable for wide angle lenses? Lenses with a larger FL tend to be not as fast, and earth rotation should play against on top of that, right? But, what is your experience with regard to FL? You tested up to 90 mm as fas as I see.

When it comes to test charts except from the Zeiss/Siemens star super fast decentration test (see further up in tokumeino's posts), my current status is, that after playing around with DIY prints, I came to the conclusion that you need an exact 3:2 frame outline on the chart (e.g., a drawn line, or the outline of the chart itself) with exact 90° angles. Only this will make sure that your alignment is good, and it really needs to be (see also here in a parallel thread). I've thus now ordered a test chart and will try it out at the weekend. You're certainly right with the need to avoid any vibration. Some guys recommend to use a flash.

BR,

Martin
 
Last edited:
Zeiss Siemens target is a quick test to check for decentering.

Shooting a brick wall at various apertures is also helpful so you can check for consistent performance from corner to corner and edge to edge.

Here is a test shot of an XF 35mm f/2 that I made upon its arrival. It's shot at 5.6, but you can see that the left of the image is softer than the right. It's apparent in the headlight and the curb.


48818596897_5acfba95d1_h.jpg


--
my instagram: https://www.instagram.com/pacific.midwest/
 
For a variety of reasons - some professional scientific - I've been testing optics for a long time. Have a few things to add to this I hope are helpful. For significant defects, & they do happen to all makers, testing is pretty easy. Bought a used XF10-24 & a simple brick wall test showed it was badly decentered - returned it.

I do astro landscapes so regularly use star images to check for decentering & lens tilt. Every prime lens I own (Sam 12mm f2, XF16, XF23 f1.4, XF56, XF90) shows a bit of decentering/tilt wide open but would probably be considered w/in spec if sent back to Fuji.

I also use the Edmonds chart & have tried the white hole reinforcers on black paper test. Have found the later requires a significant amount of decentering to show a problem - YMMV.

Recently thought I'd check my XF23 using the Edmonds chart even though I know it is a bit decentered. Set up was as well aligned camera to chart as practical. Focused carefully in the center. That test showed the right side was a bit softer than the left. Problem is star images show the opposite side is softer. This lens has only slight decentering in the usual one corner is worse that the others definition this thread has been considering. I conclude that the resolution chart test is not especially sensitive to the soft corner approach UNLESS great care is taken w/ alignment & focus. As an aside, I met one of the owners of Optical Limits review site. In our discussion, he reported how many hundreds of images they take just to be sure they've nailed the focus at each aperture. In spite of my care, my focus on a flat chart was different from my focus on stars probably because I focused in a different area.

Something a resolution chart w/ lines perpendicular to each other can detect is astigmatism - one set of lines is sharp the other direction less so. Astigmatism is another aberration that can be caused by decentering/tilt. The XF23 has 18% astigmatism - a lot. Stars are little arrowheads rather than round. Inspect test images around the edges wide open w/ no sharpening or NR applied. Look for this.

I suggest testing for astigmatism as well as soft corners/sides should be part of an SOP for new lenses.
Sorry, should have added that the SOP tests should be made w/ charts (Edmonds) resolution and/or Ziess star. I don't see astro imaging as a practical SOP test for everyone. You'll see why below.
To be confident about astigmatism tests, have to be sure there is no vibration. At longer FL, people walking near by on the ground & especially floors can cause vibration in a tripod. Avoid shutter shock & wind.

Haven't bought a Ziess chart but will now. But I suspect star images are the toughest test for decentering of all.
Hi tradesmith45

Many thanks for your recommendations.

A star photo (we can call it the 'astro test') will be a bit more effort (not that quick a test) for those living in a city, but anyway, it may be a good recommendation! May I ask you for a few standard parameters for those not skilled in the art of star photos? Aperture, ISO, ss etc. What is the 'minimum requirement' for such a photo if you do it just for testing purpose (no need to look nice), also in terms of surrounding light, 'light pollution'?

I guess the astro test is more suitable for wide angle lenses? Lenses with a larger FL tend to be not as fast, and earth rotation should play against on top of that, right? But, what is your experience with regard to FL? You tested up to 90 mm as fas as I see.
Very good questions. For those who want to do an astro test, it requires several things. Dark sky is one & that's not easy to get for everyone. The DPR astro forum frequently has post of the form "is my lens a bad copy" & the image is from a a very light polluted sky so usually unusable for a test.

IF dark sky is available, what you can try is - shoot RAW (process afterwards to increase visibility of stars), shoot wide open where aberrations are worst, use the 200 rule for SS (200/FLmm), by trial & error choose an ISO that gives a dark gray sky (not completely black) image w/ several stars visible in each corner. This will give a useful image up to about 35mm. For longer FL, you'll really need a tracker to get the shutter duration needed. Small trackers w/ basic polar alignment can be used up to 100mm but longer FL will take careful alignment & a solid larger tracker.
When it comes to test charts except from the Zeiss/Siemens star super fast decentration test (see further up in tokumeino's posts), my current status is, that after playing around with DIY prints, I came to the conclusion that you need an exact 3:2 frame outline on the chart (e.g., a drawn line, or the outline of the chart itself) with exact 90° angles. Only this will make sure that your alignment is good, and it really needs to be (see also here in a parallel thread). I've thus now ordered a test chart and will try it out at the weekend. You're certainly right with the need to avoid any vibration. Some guys recommend to use a flash.

BR,

Martin
Yes, I use the Edmonds chart mounted to foam core & it has an alignment rectangle. Alignment is critical & challenging even w/ the boarder to use as a guide. I start w/ the camera/tripod next to the mounted chart & adjust cam height to be in the center of the chart. Floors or whatever you are on may not be level & square w/ walls so from the shooting position, use the AF frame to check that the center of the chart is still in center frame from the shooting position. I lay out a T-square & make sure the camera/tripod is directly over the perpendicular projection from the chart. While the use of the chart border can help check alignment, the suggestion made about of using a small mirror to see if the camera is squarely reflected back is probably better. The old Focus Tune chart used something like that.
 
Here's my first experience with a resolution test chart.

I started w/ DIY printouts but then bought a test chart, main reason being that the alignment of camera vs chart is greatly facilitated with an exact 3:2 frame on the chart with exact 90° angles. Of course, one could also draw such a line. I preferred to invest the 16 €.

The chart I bought looks pretty similar to the DPReview chart 2005. It provides resolution measurement up to 4000 lph which is according to the seller good for up to 24 Mpx.

Another advantage is that such charts contain lph (lines per height) elements. I guess these are difficult to print at home for most people in the required quality.

My 16 € test chart. It's not ideal because it comes 2 x folded but after gluing onto a panel, it was ok.

My 16 € test chart. It's not ideal because it comes 2 x folded but after gluing onto a panel, it was ok.

My setup and procedure
  • My setup is of course not scientific, it's far from ideal lab conditions, but it's at least reasonable I guess. It took me quite a few hours just to take and sort all the images! Drawing conclusions adds of course time on top.
  • Glued the chart to a panel with 3M Photo Mount
  • Mounted camera on a tripod
  • Switched off OIS
  • Set ISO at lowest value
  • Used ES to avoid any shock + remote shutter release
  • No special care was taken with exposure. The chart supplier recommends to use a 18 % gray chart to measure exposure time but I didn't do so, I just relied on the camera. I know exposure is something I could improve. - Edit: I set + 2/3 EV exposure compensation.
  • With Fujinon lenses, I did not use OOC but darktable processed raws instead because I did not want to have lens correction applied (distortion, CA). I really wanted to see the lens's performance!
  • All lenses were taken at all apertures. With my XF 18-55 mm, I did series at FL 18, 35, and 55 mm.
  • With every lens, I did at least four or five series, with re-arrangement in between, indoors and outdoors, I used AF as well as MF. Just to be sure. - Edit: when using AF. I completely defocus, e.g., on my hand, then focus on the chart and take the image. I repeat this defocus-focus procedure about 5 times and afterwards select the sharpest image.
  • Of course I took notes; I collected every image number with all parameters in an Excel table. This table helped me to compare all images of a lens at each given aperture with Irfanview at large magnification and to select those images that were sharpest in the center for the final comparison.
My conclusions
  • It is impossible to create lab conditions at home. Forget it.
  • Testing one single copy of a lens cannot in principle answer the question whether you have a good or a bad copy. This is because of a missing benchmark! Also keep in mind that you can just test a system (camera + lens) unless you have a number of bodies available.
  • Nevertheless, it can be worth to spend a few bucks and buy a test chart
  • With this, you can at least tell whether your copy is internally 'more or less' consistent over the picture field. For example, you can test for decentration issues.
  • if you have a little gear and test it all, you will get a better feeling for differences in the performance of different lenses.
  • You can recognize the sweet spot in terms of aperture vs sharpness in the center and in the corners. Take care with conclusions macro lenses because in the macro range, different physics comes into play.
Practical tipps
  • For alignment, it is really very helpful to have an exact 3:2 frame on the chart with exact 90° angles. This is the main reason why I bought a chart. See above.
  • Alignment with such a a precise 3:2 frame on the chart is the easier and more precise the smaller the FL is - even very small deviations from parallelism become immediately apparent with wide angle lenses. This is why I still think that the 'tree test' is not so bad for large FLs - alignment plays no role there.
  • .... And, yes, I also did the Zeiss/Siemens star chart test for decentration (see tokumeino's posts, just scroll up on this thread). This test is super fast but in my opinion, it is not super sensitive.
  • Edit: What is lph or LP/PH? I.e., what is 'line pairs per pixel height'? - To answer this question, I took a caliber and measured my chart in order to find out what that unit actually is. So here's the answer. My resolution test chart is good for sensors up to 4000 px in the vertical direction (i.e., the shorter side length of the rectangle), so it is good for the X Trans III sensor but at least theoretically not ideal for the X Trans IV sensor. A resolution of 4000 lph means: 2000 black lines and 2000 white spaces (lines) between the black lines are resolved by 4000 px along the line. In other words: this is the theoretical maximum. One pixel for each black line, one pixel for each white space between the lines. The unit is the same also for the horizontal direction, the reference remains 'per height', i.e., it is not 'per width' in that case. This makes a lot of sense since 4000 lline pairs per height would equal 6000 line pairs per width, so it is better to go with lines per height in either direction.
A few results
  • See here for my results with my copy of the XF 18-55 mm R LM OIS.
  • See here for my results with my copy of the Venus Optics Laowa 15 mm f/4 wide angle macro.
  • See here for my results with my copy of the Venus Optics Laowa 9 mm f/2.8 ulta wide angle.
  • More to come
Comments, other opinions etc welcome!

BR,

Martin

--
https://500px.com/bachrocks
 
Last edited:
I would like to thank Foxjet (see here) and add a quick decentering test to the collection in this thread that I've so far always called the 'tree test'.

Fred Miranda described the principle very well and also suggested a good way how to perform the test. However, the test can still be done without turning the camera upside down. Here's how I'd recommend to take the images:
  1. Choose a small subject that fits to the corner of an image with some reasonably fine structure in it in such a distance that alignment plays no role (let's say 'dozens of meters' away). Can be a tree (but only with short ss), doesn't have to be a tree, e.g., a church clock, you will find something.
  2. Select the lowest ISO
  3. Select a reasonable aperture (I recommend f/4 or f/5.6 w/ APS-C to avoid loss of resolution due to diffraction and because lens failure is more apparent wide open, but there can also be a reason to stop down and have a better corner sharpness, e.g., f/8 or f/11). Not really a need to do the test at many different apertures. One should actually be enough. If the lens is decentered, it is decentered at all apertures.
  4. Turn OIS off
  5. Focus (AF or MF) at the subject in the center. No need to take a picture! Now make sure to keep the focus (e.g., switch the camera to MF). If necessary for reason of greater corner sharpness, you can alternatively focus to one of the corners. Either way - it is key not to change the focus between the four images.
  6. Keep ss constant throughout the following four images. I always set ss manually at this point.
  7. Now pan the camera in a way that your small subject appears in each corner and take a photo each. Depending on the fl and ss, do it handheld or use a tripod, and use ES instead of MS. You may follow Fred's precedure (turn camera upside down for two of the images) but you don't have to.
  8. Maybe repeat the test with a different subject, particularly if there is a suspicion that the lens is decentered
  9. Test zoom lenses at multiple fl
It's all about comparing the IQ in the four corners. Is it reasonably uniform or not? How large is the difference? Comparing center sharpness with corner sharpness is not the goal here.

Now comes the best. Scrolling down Fred Miranda's thread, I found a link to a tool provided by someone called keepcoding. This tool greatly facilitates the arrangement of the photos. No need to crop manually! Just upload (no worries it'll run in your browser only). Many thanks to you, keepcoding!

Here's an example:

Quick decentering test, arranged w/ keepcoding's browser tool (I made a screenshot). This example was taken with my copy of the Fujinon XF 18-55 mm at 18 mm, f/5.6 on my X-T20. The distance between subject and camera was about 20 m in this case (with a larger fl, I'd choose a greater distance). No significant decentering at this fl in my opinion.

Quick decentering test, arranged w/ keepcoding's browser tool (I made a screenshot). This example was taken with my copy of the Fujinon XF 18-55 mm at 18 mm, f/5.6 on my X-T20. The distance between subject and camera was about 20 m in this case (with a larger fl, I'd choose a greater distance). No significant decentering at this fl in my opinion.

Now comes the most difficult part of the exercise. Should you send the lens back or not? Is it normal or not? Is it to be accepted or not? You cannot expect a lens to be perfect. All the more with zoom lenses, at least not at all fl. Fred's thread (link see above) is instructive on this ('Warning: If you already love your lenses, don't put them through this test. You may get disappointed') and there are many voices with regard to expectation management. Someone in Fred's forum said rightly, the more lenses customers send back, the more we pay in the end for a new lens. On the other hand, if one purchases a lens, it has to be faultless. But again, what means 'faultless', what level of uniform performance in the corners can a customer ask for?

What are your opinions?

Would be interesting if a few of you guys here in the forum could do this quick test and share your results. Maybe you can spend a little time with your gear while you're contributing to slowing down Corona spread. This way we could get a feeling for a 'normal' lens performance.

BR,

Martin

--
https://500px.com/bachrocks
 
Last edited:
Thanks very much for posting this. I do like the idea.
I would like to thank Foxjet (see here) and add a quick decentering test to the collection in this thread that I've so far always called the 'tree test'.

Fred Miranda described the principle
I don't understand the logic of limiting the requirement to 1 vs 3 & 2 vs 4. This seems to assume decentering is the only aberration we are looking for. Pretty sure decentering+ astigmatism (an aberration present in several f1.4 XF primes) will give asymmetric results.

Have another issue to consider that may impact such results - lens profile geometric distortion corrections. These mush pixels around & crop images to correct distortion. I've noticed such corrections are usually incomplete & leave a residual amount of distortion & do reduce sharpness in portions of images. Wondering if it would be wise to use a RAW converter that allows turning off builtin lens profiles like Iridient dev.

For tests to see if a lens will work well for astro, I would stop down no more than 1 EV.
very well and also suggested a good way how to perform the test. However, the test can still be done without turning the camera upside down. Here's how I'd recommend to take the images:
  1. Choose a small subject that fits to the corner of an image with some reasonably fine structure in it in such a distance that alignment plays no role (let's say 'dozens of meters' away). Can be a tree (but only with short ss), doesn't have to be a tree, e.g., a church clock, you will find something.
  2. Select the lowest ISO
  3. Select a reasonable aperture (I recommend f/4 or f/5.6 w/ APS-C to avoid loss of resolution due to diffraction and because lens failure is more apparent wide open, but there can also be a reason to stop down and have a better corner sharpness, e.g., f/8 or f/11). Not really a need to do the test at many different apertures. One should actually be enough. If the lens is decentered, it is decentered at all apertures.
  4. Turn OIS off
  5. Focus (AF or MF) at the subject in the center. No need to take a picture! Now make sure to keep the focus (e.g., switch the camera to MF). If necessary for reason of greater corner sharpness, you can alternatively focus to one of the corners. Either way - it is key not to change the focus between the four images.
  6. Keep ss constant throughout the following four images. I always set ss manually at this point.
  7. Now pan the camera in a way that your small subject appears in each corner and take a photo each. Depending on the fl and ss, do it handheld or use a tripod, and use ES instead of MS. You may follow Fred's precedure (turn camera upside down for two of the images) but you don't have to.
  8. Maybe repeat the test with a different subject, particularly if there is a suspicion that the lens is decentered
  9. Test zoom lenses at multiple fl
It's all about comparing the IQ in the four corners. Is it reasonably uniform or not? How large is the difference? Comparing center sharpness with corner sharpness is not the goal here.

Now comes the best. Scrolling down Fred Miranda's thread, I found a link to a tool provided by someone called keepcoding. This tool greatly facilitates the arrangement of the photos. No need to crop manually! Just upload (no worries it'll run in your browser only). Many thanks to you, keepcoding!

Here's an example:

Quick decentering test, arranged w/ keepcoding's browser tool (I made a screenshot). This example was taken with my copy of the Fujinon XF 18-55 mm at 18 mm, f/5.6 on my X-T20. The distance between subject and camera was about 20 m in this case (with a larger fl, I'd choose a greater distance). No significant decentering at this fl in my opinion.

Quick decentering test, arranged w/ keepcoding's browser tool (I made a screenshot). This example was taken with my copy of the Fujinon XF 18-55 mm at 18 mm, f/5.6 on my X-T20. The distance between subject and camera was about 20 m in this case (with a larger fl, I'd choose a greater distance). No significant decentering at this fl in my opinion.
Even w/o loading this composite into the DPR gallery, it is obvious to me that image 4 (lower right, is the sharpest & 2 is softest. Results @ f5.6 should be better. A large print of a detailed landscape - 40"?- would show this difference.

Seems like a good guide to deciding if a lens problem is acceptable might be guided by the typical display size and subject matter you use. Large prints of say street photography or portraits won't show these problems.

Now comes the most difficult part of the exercise. Shoul
d you send the lens back or not? Is it normal or not? Is it to be accepted or not? You cannot expect a lens to be perfect. All the more with zoom lenses, at least not at all fl. Fred's thread (link see above) is instructive on this ('Warning: If you already love your lenses, don't put them through this test. You may get disappointed') and there are many voices with regard to expectation management. Someone in Fred's forum said rightly, the more lenses customers send back, the more we pay in the end for a new lens. On the other hand, if one purchases a lens, it has to be faultless. But again, what means 'faultless', what level of uniform performance in the corners can a customer ask for?

What are your opinions?

Would be interesting if a few of you guys here in the forum could do this quick test and share your results. Maybe you can spend a little time with your gear while you're contributing to slowing down Corona spread. This way we could get a feeling for a 'normal' lens performance.

BR,

Martin
 
Thanks very much for posting this. I do like the idea.
Thanks for this comment!
I would like to thank Foxjet (see here) and add a quick decentering test to the collection in this thread that I've so far always called the 'tree test'.

Fred Miranda described the principle
I don't understand the logic of limiting the requirement to 1 vs 3 & 2 vs 4.
Me neither. Radius is all the same.
This seems to assume decentering is the only aberration we are looking for. Pretty sure decentering+ astigmatism (an aberration present in several f1.4 XF primes) will give asymmetric results.

Have another issue to consider that may impact such results - lens profile geometric distortion corrections. These mush pixels around & crop images to correct distortion. I've noticed such corrections are usually incomplete & leave a residual amount of distortion & do reduce sharpness in portions of images. Wondering if it would be wise to use a RAW converter that allows turning off builtin lens profiles like Iridient dev.
Fully agree. I use darktable where you can switch off lens correection. I do so with my test chart photos (XF 18-55 mm, Laowa 15 mm f/4, Laowa 9 mm f/2.8).

However, the deviation through lens profile corrections should be symmetrical, right? So, at least in theory and for a quick test, in a first instance, should be OK to use the jpeg OOC.
For tests to see if a lens will work well for astro, I would stop down no more than 1 EV.
Agree.
very well and also suggested a good way how to perform the test. However, the test can still be done without turning the camera upside down. Here's how I'd recommend to take the images:
  1. Choose a small subject that fits to the corner of an image with some reasonably fine structure in it in such a distance that alignment plays no role (let's say 'dozens of meters' away). Can be a tree (but only with short ss), doesn't have to be a tree, e.g., a church clock, you will find something.
  2. Select the lowest ISO
  3. Select a reasonable aperture (I recommend f/4 or f/5.6 w/ APS-C to avoid loss of resolution due to diffraction and because lens failure is more apparent wide open, but there can also be a reason to stop down and have a better corner sharpness, e.g., f/8 or f/11). Not really a need to do the test at many different apertures. One should actually be enough. If the lens is decentered, it is decentered at all apertures.
  4. Turn OIS off
  5. Focus (AF or MF) at the subject in the center. No need to take a picture! Now make sure to keep the focus (e.g., switch the camera to MF). If necessary for reason of greater corner sharpness, you can alternatively focus to one of the corners. Either way - it is key not to change the focus between the four images.
  6. Keep ss constant throughout the following four images. I always set ss manually at this point.
  7. Now pan the camera in a way that your small subject appears in each corner and take a photo each. Depending on the fl and ss, do it handheld or use a tripod, and use ES instead of MS. You may follow Fred's precedure (turn camera upside down for two of the images) but you don't have to.
  8. Maybe repeat the test with a different subject, particularly if there is a suspicion that the lens is decentered
  9. Test zoom lenses at multiple fl
It's all about comparing the IQ in the four corners. Is it reasonably uniform or not? How large is the difference? Comparing center sharpness with corner sharpness is not the goal here.

Now comes the best. Scrolling down Fred Miranda's thread, I found a link to a tool provided by someone called keepcoding. This tool greatly facilitates the arrangement of the photos. No need to crop manually! Just upload (no worries it'll run in your browser only). Many thanks to you, keepcoding!

Here's an example:

Quick decentering test, arranged w/ keepcoding's browser tool (I made a screenshot). This example was taken with my copy of the Fujinon XF 18-55 mm at 18 mm, f/5.6 on my X-T20. The distance between subject and camera was about 20 m in this case (with a larger fl, I'd choose a greater distance). No significant decentering at this fl in my opinion.

Quick decentering test, arranged w/ keepcoding's browser tool (I made a screenshot). This example was taken with my copy of the Fujinon XF 18-55 mm at 18 mm, f/5.6 on my X-T20. The distance between subject and camera was about 20 m in this case (with a larger fl, I'd choose a greater distance). No significant decentering at this fl in my opinion.
Even w/o loading this composite into the DPR gallery, it is obvious to me that image 4 (lower right, is the sharpest & 2 is softest. Results @ f5.6 should be better. A large print of a detailed landscape - 40"?- would show this difference.
You are aware of the fact that these are 100 % crops at the utmost corners of the image? And: it's a zoom lens. But I mean that's why I'm posting and discussin this: I am here to learn.
Seems like a good guide to deciding if a lens problem is acceptable might be guided by the typical display size and subject matter you use. Large prints of say street photography or portraits won't show these problems.
I'd prefer to decouple product quality criteria from the customers' individual behavior. Don't want to be a pixel peeper, just want a product that is really OK, I mean that's what I paid several hundred bucks for! But what are the criteria? I'd like to get a feeling for what does a customer have to accept and what should be returned. There's a lot of debate about this in Fred Miranda's thread. They clearly say that you cannot expect perfection, particularly with zoom lenses.

I mentioned that I discovered a decentration of my XF 55-200 mm as late as 15 months after purchase but still within return period. I returned it to Fuji and they repaired it. Now I have it back. It may be a tad better but it's still there and I am still insecure whether I should now accept or not. See here. I've planned to do more 'real life' tests, hopefully will find some time at the weekend.
Now comes the most difficult part of the exercise. Shoul

d you send the lens back or not? Is it normal or not? Is it to be accepted or not? You cannot expect a lens to be perfect. All the more with zoom lenses, at least not at all fl. Fred's thread (link see above) is instructive on this ('Warning: If you already love your lenses, don't put them through this test. You may get disappointed') and there are many voices with regard to expectation management. Someone in Fred's forum said rightly, the more lenses customers send back, the more we pay in the end for a new lens. On the other hand, if one purchases a lens, it has to be faultless. But again, what means 'faultless', what level of uniform performance in the corners can a customer ask for?

What are your opinions?

Would be interesting if a few of you guys here in the forum could do this quick test and share your results. Maybe you can spend a little time with your gear while you're contributing to slowing down Corona spread. This way we could get a feeling for a 'normal' lens performance.

BR,

Martin
--
 

Keyboard shortcuts

Back
Top