Power of post processing

As I understand it, the first jpeg you posted was converted from
RAW using only the camera's settings. Is that first jpeg the one
you used when you did your optimizations in PSE? Or did you go
back to the RAW converter and make a new jpeg that was optimized by
hand as much as you could, before you started in PSE? I realize
from reading your workflow that you generally optimize as much as
you can in the RAW editor first, but I'm not clear if that's what
you did this time.
The first one was developed from the raw with as-shot settings and resized down to 800x600. Nothing more.

The second one I started from the RAW and tweaked settings for white ballance, exposure, etc... then continued through my workflow.

So yes, I did go back to the RAW and make custom adjustments for the second shot. As I recall, however, the raw edits were very minor. Also looking at the two shots the white ballance and exposure are almost identical, so they were not changed much in the RAW.

--
CityLights
http://www.pbase.com/citylights/favorites
http://www.pbase.com/citylights/favorite_portraits
http://www.pbase.com/citylights/favorite_animals
.
 
I have tried your sharpening technique on your other link and had
to say it works.
Thanks! I am glad I was able to provide a useful tool.
Maybe you can come up with something for the
dynamic range.
When the dynamic range is too much for the camera I either take two exposures and blend, or develop two exposures from the RAW and blend.

Procedure described here:

http://www.luminous-landscape.com/tutorials/digital-blending.shtml

--
CityLights
http://www.pbase.com/citylights/favorites
http://www.pbase.com/citylights/favorite_portraits
http://www.pbase.com/citylights/favorite_animals
.
 
Those are some great shots. Getting good people photographs is a goal of mine. Landscapes come natural to me, people do not.

You are getting good results from lightroom. I can appreciate the RAW processing power of lightroom. I have need for more editing power. Light room would only be a first step, then I must go to a full editor.

In this particular picture, the forground rock was way too bright, how do you adjust the exposure on that in lightroom without dimming the remaining highlights?

I selectively burned the sky to make it more dramatic, how do you optimize the exposure of one part of the picture without effecting the remaining in lightroom?

I used USM 20, 40, 0 as a clarifying step to remove the haze. Lightroom?

I used a two layer selective sharpening on the forground USM and High Pass, but not the background and sky. Lightroom?

Lightroom is a fast and powerful RAW development tool, but I need the remaining editing tools.

--
CityLights
http://www.pbase.com/citylights/favorites
http://www.pbase.com/citylights/favorite_portraits
http://www.pbase.com/citylights/favorite_animals
.
 
Just wondering.. do you even LOOK at the histogram while you are
going through your workflow? Thanks
Yes, constantly throughout the workflow.

I avoid blown highlight at just about any cost. Some of the editing techniques push contrast and you have to keep a watch out for them pushing the highlights off the right side of the histogram. I don't mind so much when they push the dark tones off the left side, though that also needs to be controled.

The histogram has some really deep meaning that I wish I could figure out. As I edit, I watch it dance about and am mesmorized.

No seriously, did you see something odd in the histogram?

--
CityLights
http://www.pbase.com/citylights/favorites
http://www.pbase.com/citylights/favorite_portraits
http://www.pbase.com/citylights/favorite_animals
.
 
Just not sure this is a particularly good example of the undeniable power of processing - in my eyes it has little more impact than the original - a bit more sharpness and exposure correction, the horizon is still unlevel...

There is truly much more impact to be gained in even 5 minute jobs...

--


http://www.flickr.com/photos/56011988@N00/
 
Hello, responses below...
1) i notice that you saved the image as 800x640 pixels. this is not
the camera's native 3x2 aspect ratio. did you crop this image?
Yes croped. I have a bad habit of cropping everything to 8x10. That works out to a nice even 800x640 pixels when downsized for web. I think you found a typo in the workflow that I posted.
it
looks to suffer from some wide angle distortion, but it also looks
like it's been distorted by changing the aspect ratio.
No change to the aspect ratio. I have that locked in PSE3. I crop the full image to an 8x10. Then when I resize I type 800 into the width or height (depending on landscape or portrait) and the program calculates the other dimension.

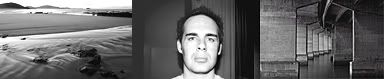
There is some wide angle distortion. It is obvious before the picture is cropped as the horizon is curved. This was shot with the canon 10-22mm EFS at 10mm.
i took the image in photoshop and changed its image size to 800x533
and the picture looks much more natural
Perhaps a little perspective correction there. I tried it, interesting, compressing the height is different.
i also noticed that citylights' "workflow" included resizing his
web images to 800x600, which is also not the native 3:2 ratio of
canon's SLR cameras.
unless you are cropping the image to a different ratio or purposely
distorting it i would recommend trying to keep the image's aspect
ratio unchanged.
No distortion, just a crop. 8x10 is a bad habit I picked up from printing everything that size. Now everything I see needs to be cropped to that aspect.
i typically resize my images to 1200x800 for the web for "good"
pictures. snapshots i just run windows powertool resizer on them
and let it go nuts
Framing an image to take full advantage of the sensor without cropping is probably best. I am just stuck on that standard print size. 6x4 is a standard print size that works well with the 3:2 aspect ratio, but I just haven't picked that up.
2) that workflow seems very involved. duplicating layers numerous
times, when i wonder if i can get the same results using curves and
USM on just the background layer with a jpeg image...
my "workflow" - auto levels, if i don't like the result, curves,
crop (if desired), resize, USM, save as....
My workflow was developed for photoshop elements. Elements does not support curves. A good portion of the workflow (about 6 of the layers) is to create the same thing you can do with curves, faster and easier.

On the other hand, I have tried a couple programs with curves and have not been able to get the same control as I do with my work flow. Maybe it is just practice.

I also like to make the edits on different layers for control over the strength of the effect by reducing the opacity.

--
CityLights
http://www.pbase.com/citylights/favorites
http://www.pbase.com/citylights/favorite_portraits
http://www.pbase.com/citylights/favorite_animals
.
 
Just not sure this is a particularly good example of the undeniable
power of processing - in my eyes it has little more impact than the
original - a bit more sharpness and exposure correction, the
horizon is still unlevel...
Ok, I am game. Lets see your example of before and after processing.

Oh and the horizon... it is curved and thus hard to level. The butte on the left sticks up making it look worse. It can't be more than 0.5 deg out of level... Oh, well I did level it some.
There is truly much more impact to be gained in even 5 minute jobs...
Please, example and explanation of the workflow. I like to learn. ;)

--
CityLights
http://www.pbase.com/citylights/favorites
http://www.pbase.com/citylights/favorite_portraits
http://www.pbase.com/citylights/favorite_animals
.
 
Much of this is way over my head, but have you ever considered
teaching digital photography?
You seem to really have a knack for the techniques of PP.
Take it one step at a time. Learn one technique at a time, then build them into a work flow.

I recommend any of scott kelby's books on post processing for either elements or full photoshop. Nice step by step instructions for useful things.

I teach as a 2nd job, though not photography. Hmm... I think teaching photography or even post processing would be fun. Without a degree in anything that remotely resembles an Art it might be difficult to convince the college that I am qualified. They get a little upity about credentials.

Maybe on the side...

From what sandman has mentioned, it appears that he does some teaching.

--
CityLights
http://www.pbase.com/citylights/favorites
http://www.pbase.com/citylights/favorite_portraits
http://www.pbase.com/citylights/favorite_animals
.
 
I followed your processing method in PS4. I did except creating new layer and sharpen use soft edged brush..Some reason the way expressed didnt work for me only the last sharpening portion in new layer..

Tell me your comment .

Original
-----------------


After Your method post processing
---------------------------------------------


--
 
Wow, vibrant and contrasty! That is how I like my landscapes. Very nicely done. Sharp, clear.

Watch the blown highlight in the cloud, you are loosing some detail there.

I like it the way it is, but it is perhaps a little too saturated. When you have the black and white soft light layer and the duplicated background soft light layer... reduce the opacity of the duplicated background soft light and increase the opacity of the black and white soft light.

That will keep the contrast about the same, but reduce the saturation.

You could also do a saturation adjustment layer and drop the saturation by about -10.

I am happy that the workflow is producing good results for you.
Tell me your comment .
Original

After Your method post processing


--
CityLights
http://www.pbase.com/citylights/favorites
http://www.pbase.com/citylights/favorite_portraits
http://www.pbase.com/citylights/favorite_animals
.
 
Ok, thanks much for the (additional) explanation. Excellent work, by the way, since I forgot to mention it in my first reply. I learned several good tips reading through your workflow, and I'm sure I'll learn more when I actually work through it with a picture.

-Garrett
 
OK,
I guess its a matter of taste, but here is an example.

First I will use the levels on different selections of the image, eg. To bring out detail in the rocks, increase contrast in the sky...

I usually correct any perspective issues (point taken with your example -curved horizons and shorelines can be impossible to level)

dependant on the mood, I will either saturate a little or desaturate if thats what i'm going for.

I use the photo filters on selected areas of the image to warm up aspects (e.g. sand / rock faces) while retaining the cools and greens in foliage / water.

If required, I will recrop and rubberstamp out any imperfections (i.e. some detraction to composition in a corner or dreaded dust spots etc..)

Then I apply USM, sometimes to the whole image, sometimes selectively.
Usually a pass of 1.0 @ 150, then a .2 @ 100. This obviously varies however.

Examples below:

Before:


After:


--


http://www.flickr.com/photos/56011988@N00/
 
"It is a sin to make more efficient, that which should not be done at all." -- Peter Drucker (famous management consultant)

As a general comment, a lot of shots I see posted on the web are "over-cooked" in the processing. So over done in the processing that they take on a circus effect. Folks get carried away goosing this setting or that.

The darkroom has always been important and always will. But the power of PS et al has not always made for a better photograph.

My $.02
 
Yes, but if you oversharpen edges, you will get halos around everything that make it very clear that you oversharpened. Regardless of how you do your sharpening, you need to take care not to overdo it.

--
Conglomoreum is dead! Long live Conglomoreum!
http://www.artistlies.com
 

Keyboard shortcuts

Back
Top