Joe,
I like both versions (color and B&W). Could you reveal your
technique?
Thanks!
--
Steve
http://stevetruongphotography.com
Thanks, Steve.
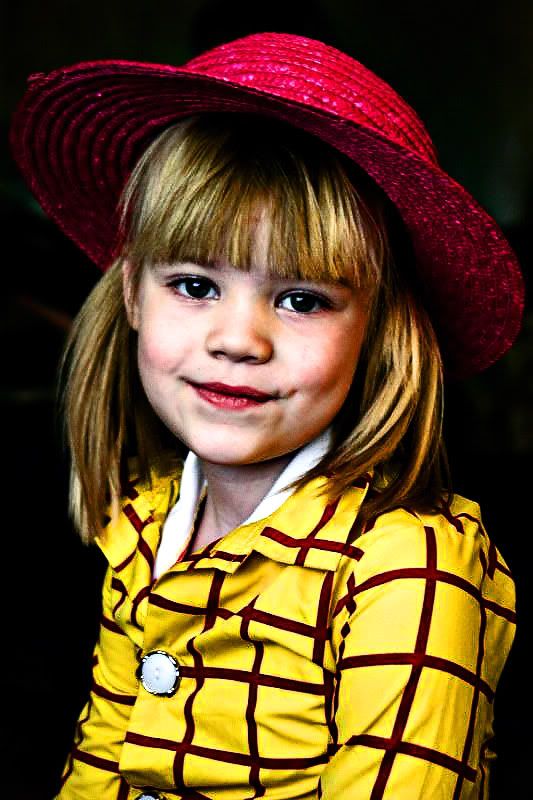
I will be glad to discuss what I have been doing with these high-key images, but please don't confuse me with any of the real experts that populate this site. I'm just a hobbyist tinkering around with some of the fancy tools that you pros use.
The first thing I do is to cleanup the imperfections. Since she has a child's skin, I only used noise reduction to smooth out some of the splotchy areas on the cheek.
The second step is to add a little bit of glow to the face to make the tonal transitions more gradual. This time around, I experimented with a variation of Feivel's gothic glow method. I did this with three layers. The first layer (bottom) is Gaussian blur filter at 5 pxls and Multiply blend mode. The middle layer is made from a merged copy of all visible (Alt+Shift+Ctrl+E) with the blend mode set to Screen. The bottom layer opacity is now reduced to 25% to lighten the image. The top layer is made with Alt+Shift+Ctrl+E again, and is a high-pass filter at 2 pxls and Soft-light blend mode. I use the "glow" technique more to give me gradual tonal transitions, not because I actually want glow.
The next step is to mask the background and put the subject on white. The reason for doing this early in the process is because it is hard to appreciate how light you want the tones to be until you are working against a pure white background.
The key step for high key is a single curve adjustment layer. This is the artistic step that either makes the high-key look right or not. I do this with a fully desaturated image so that the color does not fool me as I study the tones. A guiding principle is that I want the skin to transition from near white on the light areas to middle gray or even a little darker. The benchmark I use is for the whitest areas on the cheek, chin, or forehead to be between 5 and 15% grayscale (not pure white). I target 10% grayscale for these lightest areas, and I don't trust my eyes -- I go by the numbers.
Another benchmark I use is 40 to 60% grayscale for the shadow side of the nose, cheeks or forehead. This is important to give the face a natural, 3D appearance. This seems like a lot, but it seems to work if the transitions from light to dark tones are very smooth. Darker shadow areas under the chin or under the hair can go to 80% grayscale and still look good to me.
A second guiding principle is that the transition from the light areas of the skin to the dark areas must be very smooth for high key to look 3D. If the transition from light skin to dark skin is smooth, then you can get away with a fairly large shift in tones, which is what seems to give a good 3D effect. The purpose of the earlier glow step is to help ensure that the transitions are smooth. I also use PWL methods to smooth and adjust the transition areas and darken the sides of the face.
The last step uses the PWL methods for final touch up. I also paint the white halo effect on top of the image with a huge brush with the Flow set to 10 to 20%. If it is a color high key, then I return the partially desatureated color layer.
Hope this is a benefit to you. It always helps me to go through these steps and think about them.
--
Best regards,
Joe
When the eye sees a photograph, the mind sees an illusion of reality -- or something better.


")