I will pore over the kodak document and apply the principles to my next works
about the curtain, what about one of those sheer polyester curtains, would these work?
I don't recommend a soft light for fashion but if want to try it then aim your monolight into a V-flat and use the bounced light as your large soft light source. It is simpler and easier than trying to shoot through curtains or fabrics.
The typical thin white curtains for windows won't diffuse the light enough so you would get a hot spot in the light that passes through the curtain.
Plastic shower curtains are better diffusers but you may find a hot spot in the light.
Translucent white nylon or Dacron fabric from a fabric store works well as a diffuser for portraiture or for small product photography.
Generally the fabric is stretched across a frame to produce a scrim, which is backlit. Hanging a shower curtain to translucent white nylon or Dacron fabric from a doorway, from background stands, or even from one stand with a horizontal board bolted to it are other ways of producing a scrim. Here is an example of a commercial scrim but it is easy to make a square or rectangular frame using PVC piping and joints then clamping the fabric to the frame.
Adorama - Matthews 48x48" Solid Frame Scrim with White Artificial Silk
By varying the distance of the scrim from the subject and the distance of the light from the scrim you can change the lighting from extremely soft to fairly hard and roughly control what parts of the subject are lit. It takes time to learn how to use a scrim well so I wouldn't recommend using scrims to you.
If you want to try a scrim take your camera with you when shopping. Set the lens to Manual Focus and ∞, place one layer of fabric over the lens, aim at a bright light source, and find the exposure. Add a second layer and see how much the exposure changed. You want fabric that reduces the exposure by about 1.3 stops to 2 stops. The more stops of light the fabric absorbs the more it will diffuse the light and reduce any hot spot.
I don't recommend using a large diffuse light source for fashion but I know that it is used, and
elliotn's post is a good example of how it is used. This, however, is not a simple large light source like a curtain or fabric hung vertically and backlit, or even a scrim, it is a 60" or larger diameter umbrella elevated and aimed at the subject. You aren't ready to try this and you don't have the room in your studio for a large umbrella like this.
Stick with simple lighting.
jlafferty summed up the types of hard lighting I would also recommend, butterfly and short lighting while using an adjustable reflector or fill light to control shadow densities.
also, foam boards and white duct tape are on my shopping list for this weekend - only difference between duct tape and gaffers tape is the adhesiveness right?
Duct/Duck tape
can will leave a residue when removed. Gaffer's tape doesn't leave a residue even if left in place for days and days. Gaffer's tape also has a very strong adhesive so be careful you don't do things like pull the paint and paper surface off a plaster board wall when removing the tape.
B&H - Impact Gaffer Tape (Black, 2" x 55 yd) GT10-255B B&H Photo

")

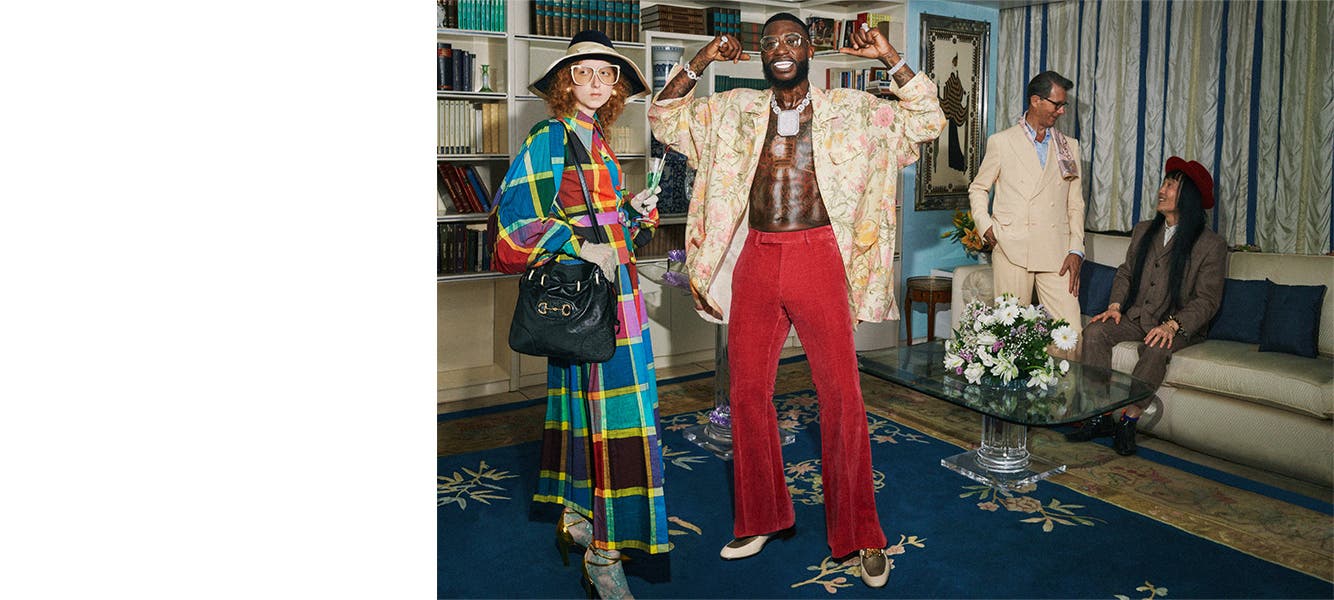
") Let's see: key hard and frontal and close, chest-sized speculars, shadows thrown across the room onto the back wall, wide angle lens, absolutely no "bokeh". The only rule in fashion photography: there are no rules. Note the huge fill, clean subject colors in a room far from neutral. Chances that photog used continuous light = 0.00%
Let's see: key hard and frontal and close, chest-sized speculars, shadows thrown across the room onto the back wall, wide angle lens, absolutely no "bokeh". The only rule in fashion photography: there are no rules. Note the huge fill, clean subject colors in a room far from neutral. Chances that photog used continuous light = 0.00%