Trying to take pictures of the night sky

flipster103

Active member
Messages
70
Reaction score
1
Location
US
So I've looked up a lot of useful tips on taking pictures on the night sky, but can't seem to do it right. I have no idea what I'm doing wrong and my pictures keep coming out overexposed like this. I have my canon rebel t1i mounted to my tripod on manual mode with the focal length at 18mm, an aperture of 3.5, iso of 200 and the shutter speed set to 30 seconds. People seem to do this with awesome results, so can someone please help me out here? I'm using the 18-55mm kit lens too. I really like these forums too because there's always helpful people on here :) . Thank you!!

 
Looks to me like you're suffering from light pollution. City lights will pollute the sky and can result in overexposed images. Try finding some dark skies (moonless night preferable) away from the city and taking the shot again. This may involve driving to a remote location. Concentrate on a dark portion of the sky, such as a constellation or galaxy, and don't include lit objects (i.e. buildings or light post).

Hope this helps.
 
Since your sky, in the sample pic, is pretty bright and there are shadows on the side of the house, I'd suspect you've got some ambient light doing you in.

Take a look at : http://www.danheller.com/star-trails.html#4.2 and look at what they say about the moon contaminating the shoot and making things look like daylight.

Next time you try it, you might try picking a time after moonset or before moonrise, or at new moon, and away from city lights or other artificial lights.

Good luck.
 
I agree that you are probably suffering from light pollution.

This photograph was taken in the mountains of Montana far from any artificial light source. The full moon was rising behind me and the mountains were lit only by the moon. Some stars are visible but because of the brightness of the moon only the brightest stars show in the photograph.

Photo was taken with a 5DMKII set at ISO 1600 f/4.5 (if I remember correctly) and an exposure of 15 seconds. The tent was illuminated from inside with a flashlight for 7 seconds during the exposure.


This photo was taken without any moon present. Exposure was ISO 3200, f 2.8 and 15 seconds. BTW longer than about 15 seconds and you start to see the stars elongate due to the rotation of the earth.

 
Remember, your camera wants to expose for medium gray. The scene you have taken is much darker. So if you use any type of automatic exposure you will way overexpose the picture. The camera will want to give everthing a tonal value of meduim grey.

Use your exposure value compensation to reduce your exposure by at least two f stops. If that does not work go to manual and either increase your shutter speed or reduce your aperture. Experiment until you get the picture you want

Although you may have light pollution, it has nothing to do with your picture. People have been taking great night pictures in heavily light polluted cities for years.
--
The first camera bag you buy is always too small

http://www.flickr.com/geofiz
 
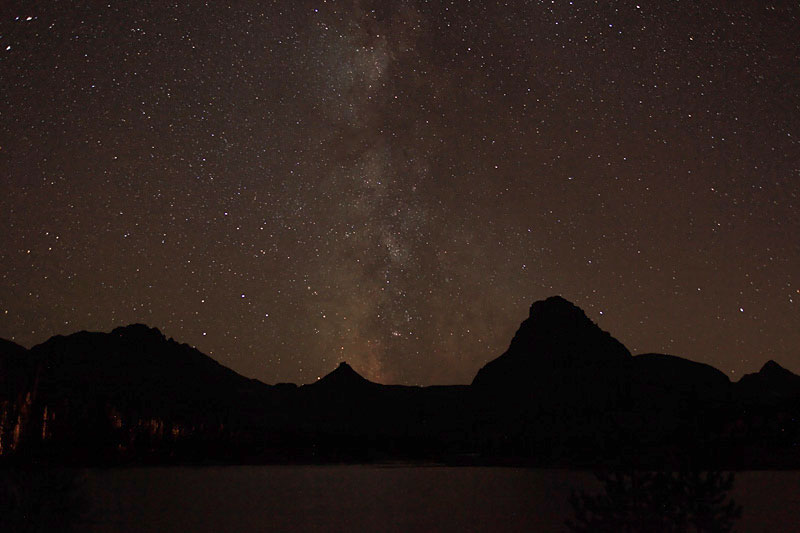
I love taking night pics, its something that, if i didn't have a job, i would have a gallery full of these shots. I agree with the rest of the folks, horrible amounts of light pollution. The picture is also slightly out of focus, I can see stars but they aren't pinpoint. In anycase, here are some helpful suggestions.

1. Know your camera in and out...being out in the dark is no time to fumble around with the manual or try to figure out something new. The T1i has a neat feature that allows you to shoot up to 10 frames continuously for 30" each exposure. Then you can stack it later in PP.

2. Know your lens...most lenses go past the infinity focal length. My recomendation is to turn on the live view and figure out where your infinity focus point is, then mark it on the lens so you know exactly where to focus at night. depending on the lens you may or may not be able to use live view on the stars themselves out in the field.

3. Google "Bahtinov Mask" and make a small one....i use it all the time for astrophotography and have great results. Here's the wiki link: http://en.wikipedia.org/wiki/Bahtinov_mask

4. Invest in a good tripod. There's nothing like getting the perfect shot then realizing when you get home there was vibration in the tripod.

5. Carry a remote and have it attached to the camera or neck strap. I can't tell you how many times i've left behind a remote, and cursed every mile driving back to get it. Without the remote you are limited to 30". I would recommend the RC1 it works with the T1i and can be attached easily...and its small.

6. Shoot in RAW format, you can always adjust the WB later. If for some reason you must shoot in JPG, set WB to tungsten. Since there will be some light pollution wherever you go. If none, then you get a nice bluish tint.

7. Don't shoot wide open. Stop down the lens a little to get slightly sharper images. You can always shoot longer and get startrails.

8. Have fun!! It takes a lot of practice perfecting this, but the results you'll get will be amazing. Here are a few i've taken:

http://imranazizphoto.smugmug.com/Vacation/BanffJasper-2010/14163461_hAMTn#1045256554_wmU3c

http://imranazizphoto.smugmug.com/Vacation/BanffJasper-2010/14163461_hAMTn#1045257597_HScvB

http://imranazizphoto.smugmug.com/Astrophotos

--
IA
imranazizphoto.smugmug.com
 
All the information given here is great and is spot on. But the best thing to remember is that the images are free, go out and just start shooting. I bet you have already improved 100% over your posted image. I agree that some of the most dramatic photos nighttime photos taken are with a Moon or clouds in the sky. I have my old but very beloved 400D without live view, but I plug away to make each shot a little better. Have fun!!

http://www.pbase.com/rjgjr


Try using the The New Jiffy Calculator. It's a modernized exposure calculator from an old school design. It's available in pdf @ http://www.stacken.kth.se/~maxz/files/jiffy.pdf . I've printed mine out on cardstock and it lives in my camera bag now. It's really a helpful tool for nighttime photography.

Also, remotes are a great thing to invest in but if you don't have the time or money, cheat a little. Before I picked up my remote, I just set the timer and let go of the camera on the tripod and it usually worked out pretty good.
 
Ehh, thanks for the calculator, but I have absolutely no idea how to use it lol. I've been looking at it and it's just confusing me.
 
Sorry, I'll try to explain it if I can but first, did you get it assembled? I screwed mine up the first time but I've attached a colored picture of the where to cut and fold. Fold on the Red Lines, cut on the blue.


Look on the back of the Jiffy at the Scene Number Descriptions. Find the one you're trying to do, let's say its' number 26, Full Moon, Landscape. You'd slide the film speed you desire down to match number 26. For the sake of this, we'll use ISO 200. You then look further to the right to see the different Shutter Speed / Exposure Time at various f stops. For Scene 26, ISO 200, you'd have a 45 second exposure at f 5.6. If you bump to ISO 400, you'd have a 20 second exposure at f5.6.

Let me know if this helps.
 
Weird, wrong answers.

Oilman is right.

The reverse happens, (everything is too dark) when you photograph agaainst a white background, like snow or white beach sand.

Try taking a picture of something black, and then something white, filling the viewfinder, and see the results.

Then try a subject with lots of light things, dark things and medium things. It will turn out fine.

Good luck

BAK
 

Keyboard shortcuts

Back
Top