Fixing my 18-200

faTony

New member
Messages
9
Reaction score
0


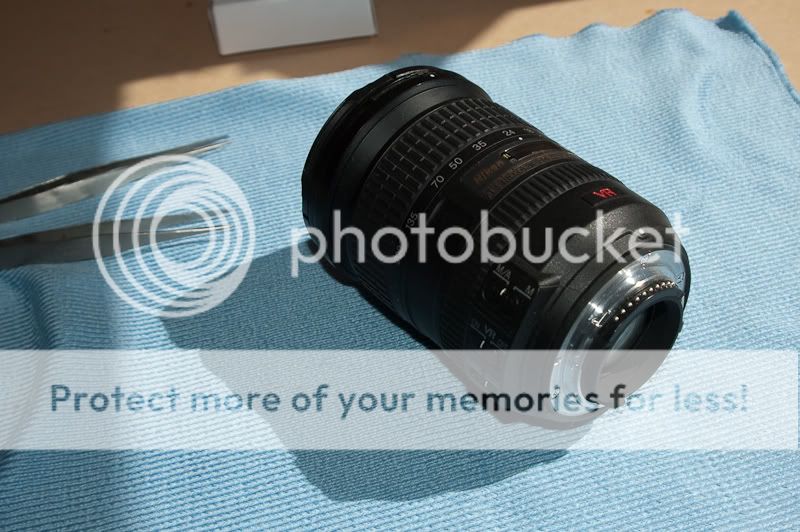
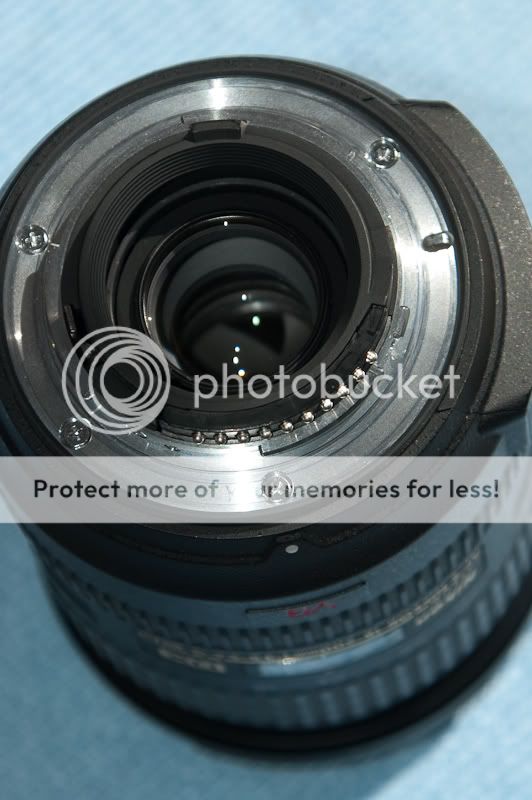
This is the photo of the offending lens. Hit the ground on the top left. The zoom is jammed and the aperture doesn't work either. None of the blades are visible. There was lots of rattling around when you shake it as well. Very luckily, none of the glass was broken.


The tear-down begins... Removed the screw that hold on the lens mount.


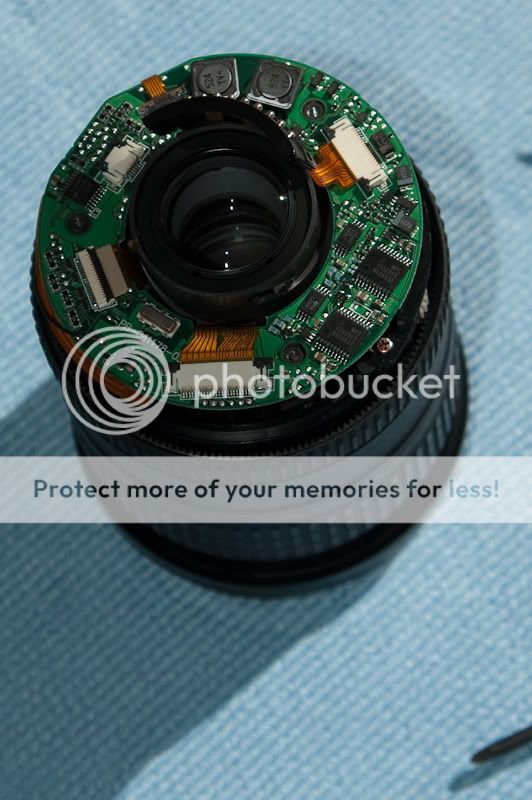
Exposed main circuit board. Removed all connectors and de-soldered connections to the focusing motor.


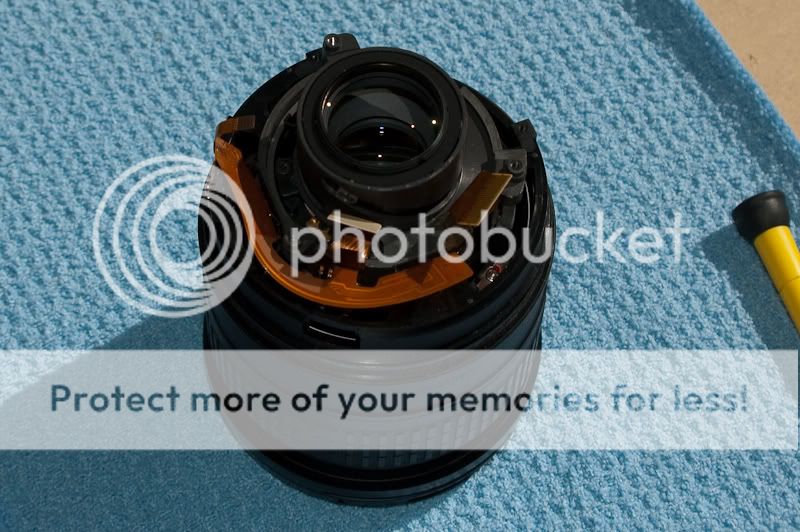
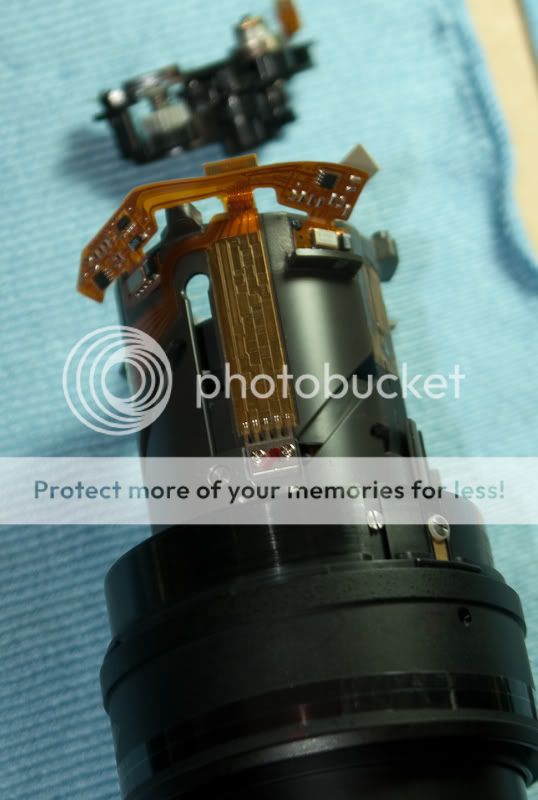
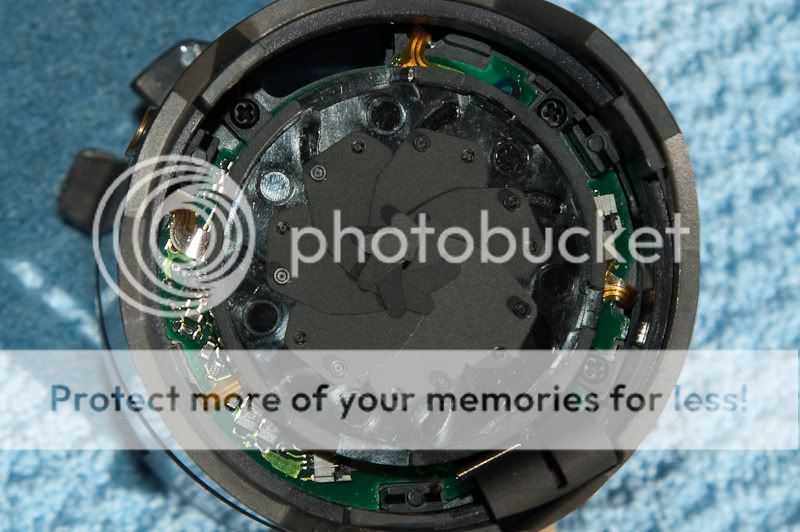
The internal lens assembly. The central tower contains the aperture and broken parts.


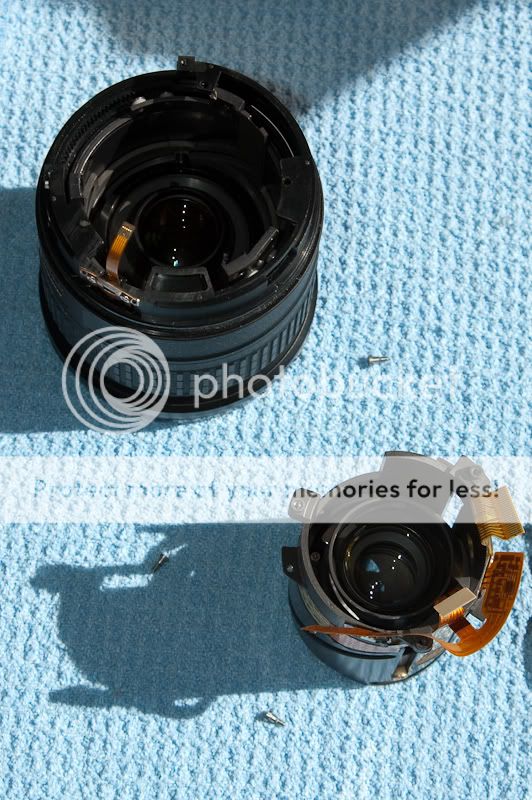
Central Lens assembly removed.


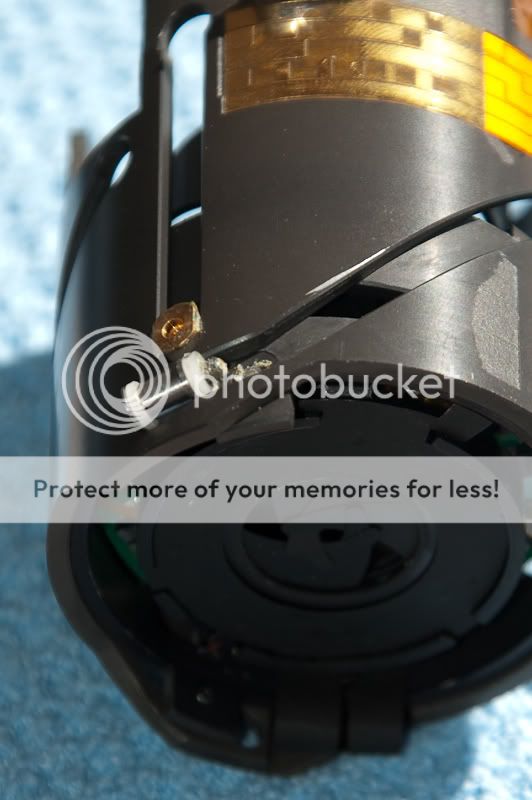
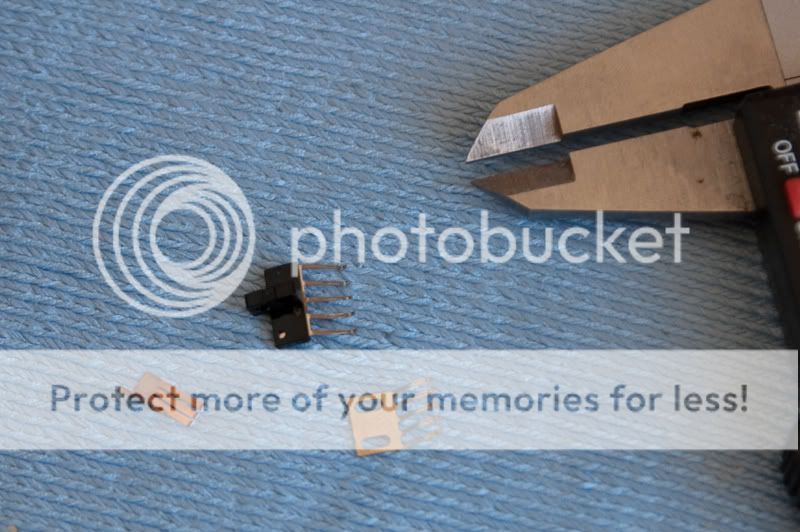
The broken guide pin and aperture blades. I had taken the lens apart earlier and reseated the blades that were not bent into oblivion.


The broken blades are removed. The blade actuator and cap are bent back into shape on the right. When the lens was dropped, they got wedged between the central and outer lens assembly. There is a large fracture in the blade actuator but it should still do its job so we aren't going to replace it.


:) non mashed up blades. pretty...


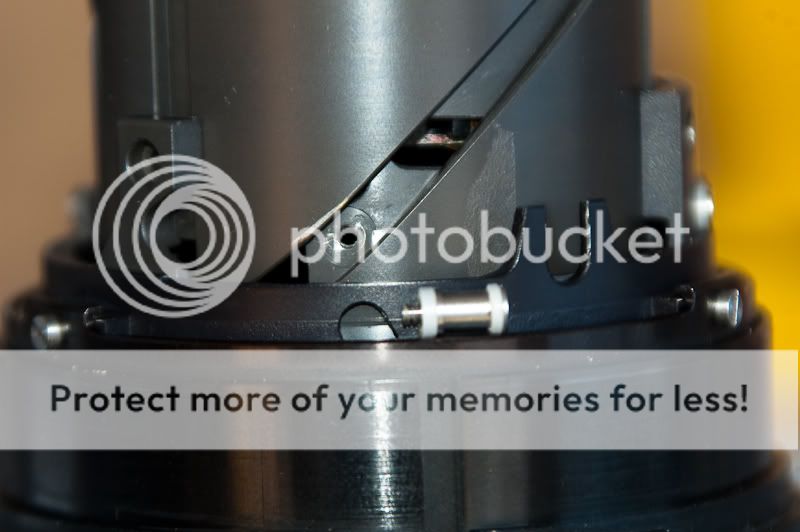
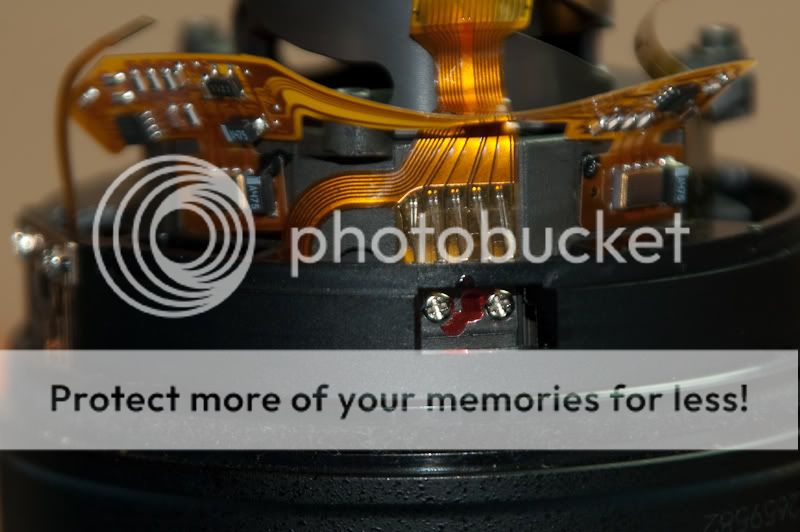
The guide pin should sit in the hole on the left and slot into the guides on the right. When the lens was dropped, the force ripped it out and stripped the thread. I'm just going to use super glue to fix it back it. It means that if anything inside the central lens assembly breaks I can't actually take it apart to get to it.


The guide pin back in its place. Just have to wait for it to dry.


Luckily this is as far as I have to disassemble the lens to fix all the parts.
Starting from the top left and going clockwise:
Aperture arm and lens mount
Internal lens mount bit
AF and stabilization switches
Main board
Focusing motor
External Lens assembly
New blades
Central lens assemble
Focusing ring
and in the center... misc screws and position conductors.

Will wait for the glue to dry and then start the reassembly....
 
Very nice and good luck with the reassembly, was interesting to follow the procedure and see all the inner parts.
Have you done this before?
--
Robert Capa : If your pictures aren't good enough, you
need more megapixels!!!
k.barros
 
Thanks,

This would be the first time. I was really excited to get the broken lens because I got to see what $1000nzd worth of lens is like on the inside. I Just thought others might like to see whats inside as well.
 
Reassembly went great. The aperture lever action sticks a little. Is probably because of the fracture in the actuating plate or my crappy reshaping job but the camera doesn't seem to have a problem with changing the aperture.

All details reported to the camera, including the focal length, seems to be in order.

It seems a hair softer on the right side.

I'm not to sure if the spacer rings in the lens have a direction because I just randomly put them back in. Might play around with those and tighten the screw to see if i can sharpen up the right side.
 
Thanks for sharing! Neat to see inside the lens. You have a lot of courage to dig in like that. I've taken many things apart in my life too... but the reassembly success hasn't been too high! Let us know how it works out - post a shot using the fixed lens. Peter
 
... the lens needs realignment.
How you gonna do that?

I used to fix cameras (up to F4) but I always stopped at taking apart optics 'cause I never had access to an optic bench.

It comes a time when "a man has to know his limitations" and leave it to the pro's.
It seems a hair softer on the right side.
 
Yeah, maybe someone out there can help shed some light on that.

The spacing rings next to the lens mount don't seem to have a direction. So the only other thing I messed with is the connection between the central lens assembly and the front glass. There are three screws holding that in place and the thread on the central assembly seems to rotate. I tried playing around with that but its a bit hard to tell the difference.

I saw in an online video they hooked a lens up to a projector to check the image quality which would make it much easier to check the alignment.

I took a photo out the window in raw and imported that into lightroom. I turned off sharpening and exported it to photo bucket (jepg Q100, also turned off export sharpening). Unfortunately photobucket took the liberty of resizing it for me.


The stadium on the left seems sharper than the houses on the right edge. If anyone out there knows about alignment that would be great.
 
Hey, you could always just shoot wide open and take out the blades :P
 
Hah hah aha it iso funny that you have lots of pictures of the disassembly but then that is where you stop ! No pictures of re-assembly!

I love the thread because it makes so muc sense to me why the reason is that these products are built in China. Imagine how much that would cost in North America?
 
It seems that you don't want to accept that this is not a repair that you can do on your kitchen table. Without an optical bench with a laser alignment you can't do it!

This is not an trial & error kind of thing. You'll never get it right.

This cannot be done perfectly right even on primes. You are messing with a zoooom!! Take it to Nikon before you trash it beyond repair.

I'm not exactly an amateur when I'm saying this, I have some years of experience repairing pro Nikon cameras.
Yeah, maybe someone out there can help shed some light on that.

The spacing rings next to the lens mount don't seem to have a direction. So the only other thing I messed with is the connection between the central lens assembly and the front glass. There are three screws holding that in place and the thread on the central assembly seems to rotate. I tried playing around with that but its a bit hard to tell the difference.

I saw in an online video they hooked a lens up to a projector to check the image quality which would make it much easier to check the alignment.
The stadium on the left seems sharper than the houses on the right edge. If anyone out there knows about alignment that would be great.
 
You are brave and talent
Thank you for the strip show. This is the first time I see a woman naked.

--
'Photography is about feel of view, not field of view'
 
The whole post is proof that you're wrong, and you CAN fix this on your kitchen table. It takes perseverance and talent.

I've hacked and fixed enough stuff on my kitchen table to understand that technology is not "magic": controlling and repairing it is very rewarding.
It seems that you don't want to accept that this is not a repair that you can do on your kitchen table. Without an optical bench with a laser alignment you can't do it!

This is not an trial & error kind of thing. You'll never get it right.

This cannot be done perfectly right even on primes. You are messing with a zoooom!! Take it to Nikon before you trash it beyond repair.

I'm not exactly an amateur when I'm saying this, I have some years of experience repairing pro Nikon cameras.
 
... you don't understand my french. Let me translate: you can repair most things mechanic or electronic but you can never realign optical elements back to manufacturers specs, on your kitchen table.

And about talent: it's related mostly to arts. You don't need talent to fix a car or repair a camera. You need knowledge, experience (or understanding of what you're doing) and dexterity. and the right tools.

Do you have the right tools to realign the lenses in a zoom?
The whole post is proof that you're wrong, and you CAN fix this on your kitchen table. It takes perseverance and talent.

I've hacked and fixed enough stuff on my kitchen table to understand that technology is not "magic": controlling and repairing it is very rewarding.
It seems that you don't want to accept that this is not a repair that you can do on your kitchen table. Without an optical bench with a laser alignment you can't do it!

This is not an trial & error kind of thing. You'll never get it right.

This cannot be done perfectly right even on primes. You are messing with a zoooom!! Take it to Nikon before you trash it beyond repair.

I'm not exactly an amateur when I'm saying this, I have some years of experience repairing pro Nikon cameras.
 
And to think that I got all worked up about just taking off the front element to remove a fairly large piece of dust (or some other foreign object).

Thanks for the pics of the internals... I was curious to see how the thing was put together.
 
... you don't understand my french. Let me translate: you can repair most things > mechanic or electronic but you can never realign optical elements back to > manufacturers specs, on your kitchen table.
I think we should cut him some slack. The lens is in much better shape than when he started. And it has cost him nothing and been very rewarding. I have done some things like this before and know the feeling. Can he align it to original specifications? Likely not unless he is very lucky. So what! Peter
 
Reassembly pictures, the glue said 3 days till it reaches full strength so I didn't want to tax the zoom too much until then.


Checking the alignment of the rail conductors. These things help tell the camera the focal length, focus distance and f-stop. A couple got bent in the fall.


Slotting the central assembly back in. The focus motor is at the top, out of focus.


Calibrating the focal length track. Two screws in the center of the picture.


Calibrating the focus distance track with the screw tucked away inside the body. Lots of tweezers work.


Re-soldering the focus motor indicator. Forgot which wire goes where but luckily it doesn't matter. :)

Just took a lot of photos at different focal lengths and f-stops and everything seems fine. Exposures turn out great each time. I can hear the wizz of the VR when it turns on and see the image snap stable.
 

Keyboard shortcuts

Back
Top