Sorry for a late reply... Thanks for the link. I knew this one. But there
are far more tricks in such conversion. Any more tricks tips please??
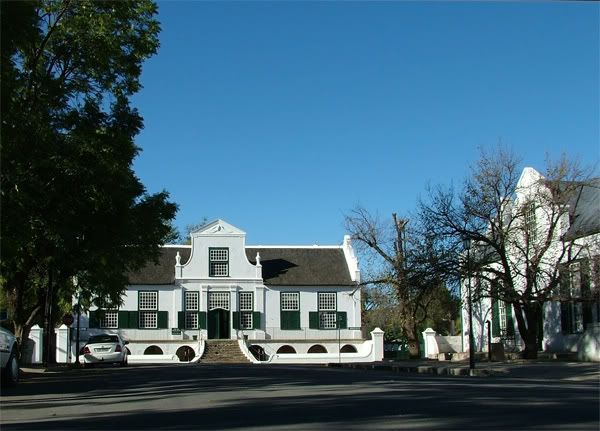
It’s more a matter of using the same old tricks in imaginative ways. Make stuff up. Place lights where there are no lights and imagine how the light would behave against surrounding objects. Take this conversion as an example:


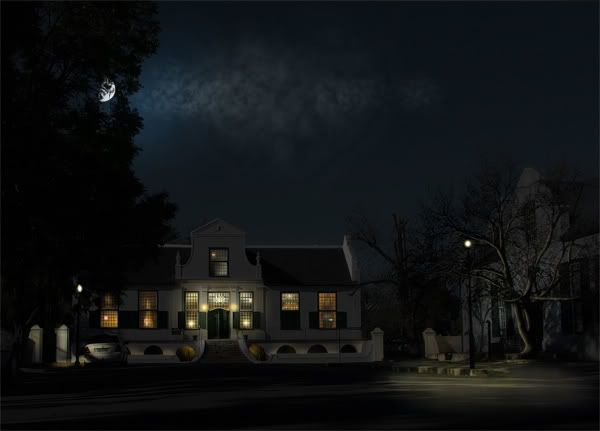
Can’t see much detail in that small image, so let me zoom in on a few illustrations. For the front door, I imagined a foyer inside with a chandelier, so I put in the indications of multiple bulbs in such a fixture. There were no lights outside the door, so I installed a couple on either side. No special trick to these. I just made them up.

Look at the wall to the right of the front door. What if there were lights below the edge of the wall illuminating that area? What if there were a light under that alcove on the left? Envision how the light would behave, and then make it happen. Again, no special technique here. It’s just creating the illusion of diffuse light on surfaces. The source of that light came from imagination.

What if the moon were behind the tree branches? And what if there were a few clouds? How would the moonlight play on the clouds? I used the blend-if slider (Layer Styles) to put the moon behind the tree branches. And Nagel cloud brushes to create the clouds.

If the moon were where I placed it, the light would fall across the roof. What kind of shadow would that make? I cloned out the original shadow (from sunlight), and painted in a new shadow consistent with the position of the moon. No trick to it. Just imagination.


")