Heart & soul nebula, having some problems compared to rogers image!

Sir Canon

Senior Member
Messages
1,572
Solutions
1
Reaction score
222
its been a little while since ive been on here but rogers recent image of the heart nebula with the meteor inspired me to shoot some images of it. i decided i wanted to have the double cluster in there as well so i shot wider than he did at a little over 135mm on my 70-200.

heres my issue, this image is 90x120sec subs at iso 1600 and f4, raw converted and stacked in dss, then brought into Photoshop... and took literal HOURS to pull out some red from the nebulae.

somehow roger managed to get many magnitudes fainter detail with an equivalent exposure time in only 18 minutes! im convinced that he has magical astrophotography powers ;-) Can someone explain how this is possible to get so much detail so fast??

also theres this splotchy nasty color blobs in the background and the same with my recent Andromeda photo how can i fix/prevent this in editing? thanks!

5f1a7eeccf614d5f85fad8db4aa4f7ee.jpg

[ATTACH alt="another example of the "splotchy" background"]1514745[/ATTACH]
another example of the "splotchy" background

--
I tend to overdo things
 

Attachments

  • 00fea66224df41f4a609d57875f716be.jpg
    00fea66224df41f4a609d57875f716be.jpg
    6.9 MB · Views: 0
Last edited:
It doesn't require magic. ;) It actually doesn't even require super awesome equipment. It doesn't require mind blowing skills. Getting Roger-like results first and foremost requires one thing:

VERY DARK SKIES!

This is something I've been trying to tell everyone since I came to this forum. I just said this recently in another thread. You need, require, dark skies to get good results with minimal integration times when doing RGB or LRGB imaging.

You simply cannot get deeply exposed, richly colored, brilliant results with 18, 20, 30 minutes when your imaging from a light polluted area. And by light polluted, I do not mean airglow. :P Airglow is what limits a truly dark site...an exceptionally dark site is limited to a darkness of 22mag/sq" (which is VERY dark!) because of airglow. Airglow is a minuscule amount of LP. Countless objects have brighter surface brightnesses, ranging from 21mag/sq" to very bright 8-9mag/sq". So they show up extremely well when imaged at a dark site.

In contrast, the average city back yard is 18.5mag/sq" (red zone) to 17mag/sq" (white zone). Eveyr mag, or magnitude, here, is a stellar magnitude. That represents a differnce in the brightness of the sky by a factor of 2.512x. So, going from a perfect dark site, 22mag/sq", to a city back yard at say 18mag/sq", is a difference in brightness due to additional man-made artificial light, of 2.512^(22-18), or ~40x.

Even going from the average back yard to a green zone...cow pastures in the closest rural zones near a city, your still at 21.3-21.5mag/sq". That is a differnce of around 16-20x.

So, assuming you were getting a 1/3 histogram with 30 second subs in the city. Going to a green zone would mean it would take around 30sx16 second subs to still get the histogram to ~1/3 histogram. That is 480 second subs! However...unlike in the city, those subs contain mostly useful deep space light, and a minimal amount of light pollution. What does a 480 second green zone sub look like? They look like this (well, this is 420 seconds :P):

lYuQ72hh.jpg


That right there is SEVEN LITTLE MINUTES of dark site data. It isn't even an integration, it is one single exposure. :P You don't have to stick to 30 second subs at a dark site. For the record, here is what about two and a half hours of those 7 minute subs looks like when they are processed:

AT5ai56h.jpg


See full size and more details here: http://www.astrobin.com/259042/

Here is a comparison of two identical subs with identical exposure, one from a red zone (18.5mag/sq"), one from my green zone dark site (21.3mag/sq"):

nz8iRnvh.jpg


Both of these images acquired the same number of photons from the Pleiades itself. They had to, they were exposed the same. The difference is that the sub to the left acquired ADDITIONAL light reflected off the atmosphere from man made artificial light sources. The consequence of all that extra light? Take a look:

CnZCEz3h.jpg


Same amount of space photons...however the left image had many, many more times the total number of photons due to LP. Once I SUBTRACT the LP signal offset out of the image, I get images of similar brightness...but as you can see, the left image, the one from the city, is much noisier.

There is no magic, no special peice of equipment. The 420 second Lagoon Nebula image had no processing...all I did was stretch it. ZERO skill was involved. The secret is dark skies. Always has been...always will be. ;)

--
Catching Ancient Photons
 
Last edited:
Thx Jon for your post!

🖖👽
 
Thank you so much that was a wonderful explanation! yes right now i am imaging from my back yard and that is a "brown" zone on dark site finder. i live on an elevated mountain so my house is actually a better place to image from then most other places. here is the sky description at the Paul Robinson Observatory which is about 15 min from my house

"The principal indicator for the quality of our night sky is the "NELM" Value. This stands for "Naked Eye Limiting Magnitude". NELM is the faintest apparent magnitude of a celestial body that is detectable by the Human Eye. NELM is used as an index in the Bortle Scalewhich Classify's (1-9) the night sky's brightness at a given location.

Our typical reading on new moon evenings with no cloud cover is 5.9 NELM and nights with exceptional seeing we reach 6.2 NELM.

This places us at the top of Class 5 and on the bottom of Class 4 on the Bortle Scale.

Class 5 - Suburban Sky on a typical night.
Class 4 - Rural/Suburban Transition on better nights of seeing.

I have almost identical skies at my house as they have there. unfortunately living in new jersey means this is about as good as it gets, and being 15 means its a lot harder to get to dark skies because you have to get people to take you there!

im thinking i might have to get a light pollution filter :-|

--
I tend to overdo things
I'm not sure exactly what a brown zone is, although my guess is it is actually an orange zone. Zones, NELM, etc. are subjective measurements. The whole bortle scale was designed for visual observers to gauge how much artificial light would affect their dark vision. Fir visual observing, you want to get way out into the depths of a dark blue, gray or black zone. Such extremes really aren't necessary for astrphotography, though.

The best way to determine what your skies are really like is to pick up an SQM meter. These are precisely calibrated devices that will give you measurements in mag/sq", or magnitudes per square arcsecond. They are fairly exact measurements, and will leave you with little question as to how bright your location really is.

Anyway, if you are indeed in an orange zone, and based on your images, I think you are probably around an orange/red zone border, then your skies are around 19.3mag/sq". That is better than being near a red/white zone border, however you are still getting a considerable amount of light pollution in an orange zone. The difference between you and a true dark site would be about 12-13x, which means at a dark site you could expose for up to 360-390 seconds per sub! :P

A light pollution filter can help. I think the best available is the IDAS LPS-D1, and if you do get an LP filter, I highly recommend it...however, it will still leave you with some odd color in your subs at times, particularly for galaxies. And, you will still need much more than 18, 27, 30 minutes of total exposure time to create nice images. However if you acquired 3 hours of data on heart and soul with an LPS-D1, the results would be better than imaging it unfiltered, as you would have less noise from LP to contend with.

The best option, if you can handle it, is a mono camera with narrow band filters. NB filters are great for nebula imaging. They block out most of the unwanted LP, but pass all of the emission bands for things like Hydrogen Alpha, Oxygen III, Sulfur II, Nitrogen II, etc. So you can get nice, deeply exposed, pretty pictures of Heart and Soul, without needing to visit a green zone or darker dark site. I recommend looking into the ASI1600MM-Cool camera. It is much less expensive than your average CCD camera, even less expensive (almost by a factor of two) than comparable Atik CCD cameras, and ZWO has a package deal no that can get you the camera, a small 5-position filter wheel, and a full set of LRGB filters for $1500 (which is still less than just the CCD from any other company! :P) You could add one Ha filter for a couple hundred bucks, or both an Ha and OIII filter for about $400 or so. The two filters will allow you to create "bicolor" narrow band color images, with very high detail. The camera is ULTRA low noise, about 1.5e- at unity gain, with 0.008e-/s dark current when cooled to -15C.

It wouldn't matter much where you were imaging from with a mono camera and narrow band...especially with such low read noise. You could create pretty awesome images with about 6 hours of exposure per filter, possibly even less than that. For example, this is 1h50m of integrated exposure with my ASI1600 from my red zone (18.4-18.6mag/sq" on the night I imaged this):


RXPmIeU.jpg


This is Sharpless2-132, a moderately faint Ha, SII, OII and NII nebula complex, only in Ha here. Here is a SINGLE 600-second sub on the brighter Pacman nebula in Ha:

qebgPI7.jpg


Just to demonstrate the options with narrow band imaging. ;)

--
Catching Ancient Photons
 
Here are images of Heart nebula that I made earlier this year, one from my red-zone back yard and the other from a Yellow / Green zone dark site. These were made with same equipment:

Nikon D5300A

LPS-D1 filter

AT72 telescope

Orion SSAG guider with 50mm guide scope

Red zone picture:


red zone IC1805 10 x 300 sec @ ISO 200

Yellow / Green zone picture


Yellow / Green zone 12 x 600 sec @ ISO 400

Darker skies allowed for deeper exposures leading to better results

-- David F.
 
Thank you so much that was a wonderful explanation! yes right now i am imaging from my back yard and that is a "brown" zone on dark site finder. i live on an elevated mountain so my house is actually a better place to image from then most other places. here is the sky description at the Paul Robinson Observatory which is about 15 min from my house

"The principal indicator for the quality of our night sky is the "NELM" Value. This stands for "Naked Eye Limiting Magnitude". NELM is the faintest apparent magnitude of a celestial body that is detectable by the Human Eye. NELM is used as an index in the Bortle Scalewhich Classify's (1-9) the night sky's brightness at a given location.

Our typical reading on new moon evenings with no cloud cover is 5.9 NELM and nights with exceptional seeing we reach 6.2 NELM.

This places us at the top of Class 5 and on the bottom of Class 4 on the Bortle Scale.

Class 5 - Suburban Sky on a typical night.
Class 4 - Rural/Suburban Transition on better nights of seeing.

I have almost identical skies at my house as they have there. unfortunately living in new jersey means this is about as good as it gets, and being 15 means its a lot harder to get to dark skies because you have to get people to take you there!

im thinking i might have to get a light pollution filter :-|

--
I tend to overdo things
Well, there is a lot of information missing here in all the discussions.

First, you can get a good estimate of your sky brightness by using this method and your digital camera:


For my heart nebula image, the sky brightness was about 20.8, so in the middle of Bortle zone 4, even though I was in central Colorado rockies at about 10,000 feet in a supposed dark zone. High airglow.

There are many factors not mentioned by Jon that impact results besides light pollution and temperature, and that includes the camera and post processing methodology, which can have greater factors than what Jon mentions.

So I would ask you for the following info:

1) sky brightness from the Samir method using the jpegs from your camera.

2) camera model, and ISO used

3) lens focal length and f-ratio (I know you gave this, I'm just trying to be complete in one place).

4) From the exit data, the camera temperature (exiftool can get this, so can photoshop).

5) sub-exposure length.

Processing:

Did you do raw conversion first? If so how? Any darks or flats, and if so, how applied?

And let me assure you, if I worked with the output from DSS it would take me hours to try and extract color and contrast too. The gray images out of DSS are not a good starting point in my opinion. It is also not clear how DSS makes the image gray, so that makes it difficult to get to a desired color balance. Is it subtract only to get a neutral background, or does it apply a color balance too?

If your skies were Bortle 4-5, or about mag 20/sq arc-sec, then your skies were not much brighter than mine (less than 1 magnitude). Your exposure was more than mine, so partly compensates. My sensor was at 17 C, and the 7D2 has very low dark current.

So, depending on sky and camera, the difference could largely be processing, or just sky, or both.

Example, Jon posted his M8+M20. Here is a similar image compared with his (these were discussed last April):

A factor of 31 in exposure, different processing.

And a smaller 19-minute comparison to jon's image made with a larger lens, and more exposure, in fact a factor of 31 more exposure (total light collection:

A factor of 31 in exposure, different processing.

The point I'll again make, is one does not need hours of exposure time to make a nice image. Both images above are nice images (although I do not like the dark halos around Jon's stars, and Jon will probably not like something about my image).

Roger
 
Sir Canon, there is nothing special here. High airglow is a non-factor. We don't get particularly egregious airglow here in Colorado. Airglow is a very low level emission, and it is only a problem if it actually flares up into full blown Aurora...that doesn't happen much until you get up into pretty high latitudes). At 20.8 (which is yellow/green zone border...yellow zone still has enough city light pollution to be a small problem, in addition to the small amount of airglow, but it is a very small problem...this is what you get in a neighborhood that is set out from the edge of a city by about 10-15 minutes), your still working under considerably darker skies than any city imager. THAT is the primary difference, and THAT is why you are having difficulty getting images as good as Roger's.

Additionally...10,000 feet!! At such an altitude, the air is clear, very transparent. Significantly more so than what you normally have thousands or even ten thousand feet lower. I live in Colorado...inversion layer central. At ground level, there is almost always an inversion layer present, and they trap moisture as well as black body particulates. These scatter and absorb light, increasing extinction, which reduces the amount of light from space that can reach your telescope. Above about 8500 feet the air gets considerably clearer, as you get above the inversion layers. By 10,000 feet, the air is crisp, cold, like crystal. Highly transparent air is another big benefit, because there is less particulate to scatter or absorb light from space.

Roger had two things going for him. He used clear & transparent as well as dark skies to get his heart image. Double bonus there. It's harder to get to 10,000 feet, for sure! Don't worry about that. Just think about dark skies. Don't worry about equipment. It's not nearly as important as just getting out of the city. Drive 30 minutes away from town from wherever you are one night...with your gear...find a nice dark site away from heavily used roads, at as high an altitude as you can find, and try imaging from there.

You'll love the results. With whatever gear you have...they will be much better than anything you can get from the city.
Example, Jon posted his M8+M20. Here is a similar image compared with his (these were discussed last April):

A factor of 31 in exposure, different processing.

And a smaller 19-minute comparison to jon's image made with a larger lens, and more exposure, in fact a factor of 31 more exposure (total light collection:

A factor of 31 in exposure, different processing.

The point I'll again make, is one does not need hours of exposure time to make a nice image. Both images above are nice images (although I do not like the dark halos around Jon's stars, and Jon will probably not like something about my image).

Roger
Roger is correct that processing technique can matter. However, I think for someone in your position, Sir Canon, they matter less than other things. Processing technique comes with time and experience. However if you have limitations in your underlying data quality, then there is only so much you can do to improve your results...even with exceptional processing skills. I've reprocessed all of my old data from 2014 when I was still a beginner. I have been able to improve the results somewhat, however I inevitably hit a wall...not because of my processing skill, but because of the quality of the data.

I need to point out, the integration time for my data above is incorrect. I originally missed about half the data when I integrated (don't ask me how, but when I checked the FITS headers for the integration, it listed less than half my total subs were used O_o)...so the proper integration time is 22x420 seconds. Instead of 336 minutes, as Roger stated, it is 154 minutes. The examples he has used above were processed nearly 15 months ago. Here is a close up crop of my recent reprocess, which is still 22 subs @ 420 seconds each, comparing against my original process vs. my new reprocess:

Comparison of old and new: Trifid, Background Ha, Bigfoot's Toes (old left, new right)

Comparison of old and new: Trifid, Background Ha, Bigfoot's Toes (old left, new right)

Comparison of old and new: Lagoon (old top, new bottom)

Comparison of old and new: Lagoon (old top, new bottom)

I reprocessed to see if I could bring out more of the Ha data, of which there is quite a considerable amount in this region that my original process did not bring out. To enhance the details of some of the more interesting regions, such as this one, which I call Bigfoot's Toes (if you follow the outline of dark dust from Lagoon, out to it's extents...the overall shape looks like a giant footprint from, say, Bigfoot! ;P):

Bigfoot's Toes

Bigfoot's Toes

I need to be very clear here. NOTHING changed in the data. The data I reprocessed a few weeks ago, is 100% the exact same data I acquired 15 months ago. It all starts with having good data. You cannot get the kind of quality data you need to create images like Roger's Heart or my Lagoon from an orange, red, or white zone. Even with an LP filter. In a yellow zone things would be better (20.8 is around a yellow/green border)...but it's when you hit green, blue, black zones that things really start to improve considerably.

But I stress...the quality of the underlying data is the key. The more LP you have, the lesser the quality of your data will be. To overcome that, you need to integrate more and more, and more. In my case, I have to integrate about 8-10 hours of DSLR data from my red zone back yard before I even begin to get results I'm willing to live with, and those results still pale in comparison to 2 hours from my green zone dark site.

Sir Canon, the only thing you are missing is the dark skies. Your own experiences, the fact that you even asked the question, is an excellent demonstration of all of this. You have 3 hours of data, and couldn't get the same result as Roger. Even if you had a much larger aperture (I have a 150mm aperture), you still wouldn't get a result as good (I imaged for over a year with my 150mm aperture in 18.5mag/sq" skies...even with 10-15 hours, while that certainly improves things...nothing I've ever created from my back yard ever compares to anything I've created in 2-3 hours from my dark site.)

Find and use dark skies, and the kind of quality you are looking for will be within your grasp. You may not be able to make the most of it right off the bat...you might have to improve your tracking quality, and will certainly need to improve your processing skill. But it all starts with the data. If you want high quality data, get out of the city. Find a green, blue, or gray Bortle zone, something close enough to home that you can get to on a regular basis, but far enough away (and preferably high enough to get above any inversion layers in the atmosphere, so you have more transparent skies) that you have the least LP possible. Then get at least 30-60 minutes of data on each target (or more...there is always something fainter that you can reveal with more integration time), and see what you think.

--
Catching Ancient Photons
 
Last edited:
Here are images of Heart nebula that I made earlier this year, one from my red-zone back yard and the other from a Yellow / Green zone dark site. These were made with same equipment:

Nikon D5300A

LPS-D1 filter

AT72 telescope

Orion SSAG guider with 50mm guide scope

Red zone picture:

red zone IC1805 10 x 300 sec @ ISO 200

Yellow / Green zone picture

-- David F.
-- David F.
Great example! I would even be willing to bet that your yellow/green zone image could probably be pushed even further, if you were willing to try. ;)

If you have a dark site that is at a green/yellow zone border or farther, then I recommend imaging without the LP filter. Once you get to about 20.8-21 mag/sq", the filter really becomes unnecessary. Without the filter, the diversity of color that is possible expands considerably...even with an LPS-D1/P2 filter, but particularly if you were using a broadband nebular filter (LPS-V4, Astronomik CLS, UHC filters, etc.)

There are times when my dark site, which on average is about the middle of a green zone, slips into yellow zone territory. I've imaged at 20.8mag/sq" with a small moon in the sky, or during winter with a lot of snow on the ground (reflects a ton of light into the atmosphere...really hurts the quality of my dark site). The quality is still an order of magnitude or so better than my back yard. I can easily get, with my rather noisy 5D III mind you (which is quite a bit noisier than a D5300), only 2 hours of data at my dark site, and the results kick the crap out of 10-15 hours of data from my back yard. If I had the kind of transparency you have at 10,000 feet, I'd probably be getting the same with 45-60 minutes of data.

--
Catching Ancient Photons
 
Sir Canon, there is nothing special here. High airglow is a non-factor. We don't get particularly egregious airglow here in Colorado. Airglow is a very low level emission, and it is only a problem if it actually flares up into full blown Aurora...that doesn't happen much until you get up into pretty high latitudes). At 20.8 (which is yellow/green zone border...yellow zone still has enough city light pollution to be a small problem, in addition to the small amount of airglow, but it is a very small problem...this is what you get in a neighborhood that is set out from the edge of a city by about 10-15 minutes), your still working under considerably darker skies than any city imager. THAT is the primary difference, and THAT is why you are having difficulty getting images as good as Roger's.

Additionally...10,000 feet!! At such an altitude, the air is clear, very transparent. Significantly more so than what you normally have thousands or even ten thousand feet lower. I live in Colorado...inversion layer central. At ground level, there is almost always an inversion layer present, and they trap moisture as well as black body particulates. These scatter and absorb light, increasing extinction, which reduces the amount of light from space that can reach your telescope. Above about 8500 feet the air gets considerably clearer, as you get above the inversion layers. By 10,000 feet, the air is crisp, cold, like crystal. Highly transparent air is another big benefit, because there is less particulate to scatter or absorb light from space.

Roger had two things going for him. He used clear & transparent as well as dark skies to get his heart image. Double bonus there. It's harder to get to 10,000 feet, for sure! Don't worry about that. Just think about dark skies. Don't worry about equipment. It's not nearly as important as just getting out of the city. Drive 30 minutes away from town from wherever you are one night...with your gear...find a nice dark site away from heavily used roads, at as high an altitude as you can find, and try imaging from there.
Wow Jon, you extrapolated a bunch of stuff here with assumptions that are not valid. Key data points: I was in central Colorado at altitude in a dark gray zone AND the sky brightness was magnitude 20.8 /sq arc-sec. That is quite bad. 2) I took an hour's worth of data but threw out 2/3 because seeing was so bad. In fact, seeing was so bad, stars were dancing in the viewfinder of my 6D with a 35 mm f/1.4 lens! 3) I had serious dew problems, which I have never had in Colorado (I've had ice, but not dew).

You acknowledge that 20.8 is yellow-green zone. It was not city lights. It was poor transparency plus strong airglow. I saw red and green banded airglow through the night. Airglow exists all over the globe. Airglow does NOT "blow up into a full blown aurora." Airglow is a different process caused by excitation by solar UV and cosmic rays. Aurora is excitation by solar wind particles (e.g. protons) focused by the Earth's magnetic field.

Black body particulates--bzzzt. Black body is irrelevant at visible wavelengths unless the particulates are hundreds of degrees Centigrade. The problem was high humidity causing low transparency, not particulates. And with the high humidity, clouds were rolling through. A few of the frames I threw out were due to clouds.
I need to point out, the integration time for my data above is incorrect. I originally missed about half the data when I integrated (don't ask me how, but when I checked the FITS headers for the integration, it listed less than half my total subs were used O_o)...so the proper integration time is 22x420 seconds. Instead of 336 minutes, as Roger stated, it is 154 minutes. The examples he has used above were processed nearly 15 months ago.
OK, so you had 14x the exposure. Still, the images are pretty close, though yours should be much deeper. I maintain it is 1) mainly processing methodology, and 2) your older camera.
Sir Canon, the only thing you are missing is the dark skies.
Well, again your are jumping to conclusions without data, and *bold* conclusions at that. Try waiting for the additional information I asked Sir Canon for. I say processing is also a factor. All we need to do is look at this:


See Figure 9 and 8 different people came up with significantly different results.

Roger
 
rnclark wrote:.
Eh, not going to get into another deep debate with you about minutia that really don't matter. Skies of 20.8 are still more than dark enough to get excellent astro images. My parents home is up near the Indian Peaks wilderness here in Colorado, deep yellow zone, often measures 20.8mag/sq". It's around 8700 feet or so. I know quite well what 20.8mag/sq" skies are like. That's the only statistic I care about here. That's right at the beginning of where you want to be...yellow/green zone border. I consider yellow zone the real start of the artificially light polluted zones. Start there, and compared to any imaging in the city, your results with the same gear will be significantly better.

The difference between a green/yellow zone border and a black zone is small, maybe 2-2.5x. So 18 minutes of integration would become 36 minutes. You can easily get 60 minutes in either location, so the difference is moot.

The difference between a green zone and a red zone is quite large 12, 15, 20x. So 18 minutes of integration becomes 216-360 minutes. Well, getting hours of data is not impossible...one could technically acquire 4, 5, 6 maybe even 10 hours of data on a single night if they had night for long enough and a wide enough view of the sky (I've acquired about 12 hours of data across multiple targets on a single winter night on a couple of occasions). However, getting 6 hours of data is certainly more difficult than getting one.

The difference between a green zone and a white zone at the heart of a metropolitan city can be huge, 40x or more. So 18 minutes of integration becomes 720 minutes. Now we are just getting into the realm if insanity here. What you might need 12, 14, 20, 30, 50 hours of data to do in a white zone, you could do in a couple of hours in a green zone. I personally don't know why anyone even bothers to image with skies like this unless they are doing narrow band imaging. Generally an exercise in futility...and anyone trying should find even a park in an orange zone and try imaging there! :P The results would be significantly better in much less time.

A green/yellow border zone at 20.8 is great compared to imaging in the city.
Black body particulates--bzzzt. Black body is irrelevant at visible wavelengths unless the particulates are hundreds of degrees Centigrade. The problem was high humidity causing low transparency, not particulates. And with the high humidity, clouds were rolling through. A few of the frames I threw out were due to clouds.
You misinterpreted. I never said anything about black body emitting light. I said that inversion layers trap moisture and black body particulates (i.e. dust), which scatters and absorbs light.
I need to point out, the integration time for my data above is incorrect. I originally missed about half the data when I integrated (don't ask me how, but when I checked the FITS headers for the integration, it listed less than half my total subs were used O_o)...so the proper integration time is 22x420 seconds. Instead of 336 minutes, as Roger stated, it is 154 minutes. The examples he has used above were processed nearly 15 months ago.
OK, so you had 14x the exposure. Still, the images are pretty close, though yours should be much deeper. I maintain it is 1) mainly processing methodology, and 2) your older camera.
Well, I still don't believe I've ever seen a true native scale, 100% crop of your data. Only downsampled crops. So, who can really say what the actual differences are. ;) Downsampling hides all flaws.

My 5D III is definitely a noisy camera. I've never denied that. :P I proclaim it quite often, actually. Because DESPITE the fact that it's one hell of a noisy camera...moving from my back yard, which usually ranges from 18.7-19.3mag/sq" (spring/fall it tends to be more of an orange zone, summer and winter it shifts back to red zone, barring moon or particularly bad transparency which can push me brighter than 18mag/sq"), to my dark site, which ranges as wide as 20.8 to 21.6, and averages around 21.3, is a completely game-changing move.

The key here is getting out of the city to dark skies. Green zone, blue zone, gray/black zone. Outside of a couple of red zone images, I don't think I've ever seen an image from you that was made from anything worse than the border of a yellow/green zone. That is a CRITICAL factor in your ability to get good images with short integrations. All the low noise capabilities of the 7D II mean less and less and eventually become moot once you start moving into the city. Imaging from a red or white zone (at least 90% of the astrophotographers I know live and image in a red or white zone) is going to make light pollution the most significant source of noise. At that point, LP is swamping any other source of noise (except perhaps dark current on a hot night)...read noise and object signal noise just won't matter at that point:

SNRgreen = 50/SQRT(50 + 10 + 0.1*30 + 2.4^2) = 6:1

SNRorangered = 50/SQRT(50 + 150 + 0.1*30 + 2.4^2) = 3.4:1

Even if you completely eliminated dark current and read noise, your city SNR is still limited primarily by city LP:

SNRnodcrn = 50/SQRT(50 + 150) = 3.5:1

And having a city LP flux of only ~3x your object flux is not all that bad...it can be significantly worse! A white zone can be pure hell in comparison. Using the 7D II in the city, with all of it's low noise advancements, dark current suppression and all, represents an improvement in SNR of maybe 2-4% over having an ideal camera with zero electronic noise. However, ditching the city for dark skies represents an improvement of 76%!!! The best SNR you could get in this case, with a perfect noiseless camera and zero LP of any kind, would be about 7.07:1, which is twice as good as imaging in the city. The green zone gets pretty close.

Dark skies. That's the key. Beginners really should understand that, as that is why they can't get the same quality as you with only 18 minutes when they try. The camera tech really doesn't matter UNTIL your imaging under dark skies. Then, once you are...sure, technologies such as the dark current suppression in the 7D II might start to matter. But for a beginner...just getting out to the dark site and learning to acquire high quality data will do far, far more for them than worrying about which camera to buy or which processing techniques to use, or even how big an aperture they need. For a beginner it just doesn't matter. Hell, a DSLR and a wide field lens slapped onto a basic camera tracker will allow them to make awesome images...but only from dark enough skies. Try to image the milky way from the city? Pointless. Truly. No point in even trying, it's a waste of time. (And no one gives a crap if the stars go blue as you move away from the milky way, and many people prefer it from an artistic standpoint. Most beginners would be ecstatic just to have the milky way image at all, damn how the colors come out!)

Cameras come and go, and you can learn techniques over time regardless of which camera you have. Data quality, however...well, a 60-70% or greater improvement in sub quality...now that is something that will last forever.
Sir Canon, the only thing you are missing is the dark skies.
Well, again your are jumping to conclusions without data, and *bold* conclusions at that. Try waiting for the additional information I asked Sir Canon for. I say processing is also a factor. All we need to do is look at this:

http://www.clarkvision.com/articles/astrophotography.image.processing2/

See Figure 9 and 8 different people came up with significantly different results.

Roger
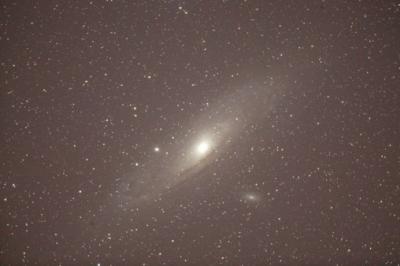
You missed the point there. No amount of processing will overcome any limitations baked into the data at a low level. Your prior Andromeda images demonstrated that quite well, I think. The blotchy, banded color noise issues of the red zone version were apparent even despite the considerable amount of downscaling. However, if you get high quality data from a dark site...then your free to process, and reprocess, and reprocess the same data over and over as your processing skills improve, and you can get better and better results.

Sir Canon is no different than anyone else asking the same questions he is. He is only missing the data quality, and the data quality comes from eliminating artificial light and improving SNR. I.e. he is only really missing the dark skies. His processing skills will improve with time as he processes more and more data, experiments with more techniques, a wider range of software, etc. Over time as one's processing skills improve, THEN the quality of the camera might start to matter, if it was an issue in the first place.

I don't believe that one particular processing technique is radically superior to another. I see people make excellent images with PS, PI, IP, MDL, StarTools and even Gimp (it's got 16-bit now, apparently). Processing skill is something you can work on forever, and you will always find ways to improve (especially if improvements in processing tools and algorithms continue to be made...both StarTools and PI have some very advanced algorithms that can make the most of your data.) However even with exceptional skills...poor SNR, pattern noise, correlated noise, high dark current, etc. Those issues are baked into the data. You can only process within the bounds of those limitations. Some of your own images suffer from correlated noise, and you have mentioned in each of those that your ambient temperatures were quite warm. So even the 7D II suffers from such limitations. Sometimes with the right processing tools, you can push noisy, banded, blotchy, streaky, low SNR data to the extreme limits, but the limits will always be there. To break out of those bounds, you have to improve the underlying data.

There are other ways to get better data other than going to a dark site. Some are better than others. At the bottom of the list would be a bigger scope. However, getting a larger aperture is going to gather more light pollution right along with more light from deep space. It isn't really going to solve the problem...all it will do is allow you to overcome some of the limitations imposed by LP more quickly, by getting more exposure in less time. Instead of say 10 hours to get an integration from a red zone that is half as good as 60 minutes from a dark site, you might need only 6 with a big, fast aperture.

However no one should be lead to believe that dropping a large, heavy, 10" fast newtonian with a bigass momnt arm on their piddly little $1500 mount is suddenly going to allow them to make awesome images with 18 minutes of data. It's just not that easy. And that big, long moment arm of the newt? That will make acquiring good tracking and maintaining good guiding that much more difficult (and usually requires a higher end mount with a much greater capacity and more reliable tracking), throwing another curve ball at the beginner who is already overwhelmed and frustrated that he can't get awesome results with only 18 minutes of light polluted data from his back yard.

Adding an LP filter won't do anything magical that either. It can help, like the newt, but it's not any more of a magic bullet.

One option for nebula imagers is to move to narrow band. I'm not really one to recommend this to beginners most of the time. It, like the Newtonian, adds complexity and can add more frustrations (although it is getting easier thanks to companies like ZWO and QHY). This is something I recommend to people who have already moved a bit past the beginner phase and have already conquered the basics. Blocking out all light except the few bands your really interested in can be as game-changing as driving out to a dark site. It has an up-front cost, however it also has the benefit of being extremely convenient...you can just set up in the back yard, fire everything up, and let a few hours of NB exposures rip for the night for a few nights. With three channels of NB data, you have a HUGE advantage in high quality, high contrast, highly detailed subs for creative coloring options at you fingertips, and you can loose your artistic side on it with gusto.

=====

To all you beginners out there asking the same questions as Sir Canon!

DARK SKIES. If there was ever a key to astrophotography, that's it. Dark skies rule. Light pollution stinks. Ditch it.

=====

Anyway, I'm done here. I don't want to have another long, drawn out debate, as it will get way off topic and into completely pointless territory and help no one. Beginners: If your asking the same questions as Sir Canon...just try it! Dark skies. You'll see the differences for yourselves, you'll enjoy the brilliant view of the sky...and you won't have to keep listening us two debate the same old crap over and over. :P

--
Catching Ancient Photons
 
Last edited:
I have yet to get my sky brightness, however the

subs were 120 seconds long

shot at f/4 at 135mm... so thats a 33.75mm aperture

ISO 1600 in a canon 550d/t2i unmodified


I processed by raw converting first then stacking in dss then editing that in photoshop.

also im very unsure how to get the sub sensor temp.i know that i could get it from the camera with magic lantern during imaging though...
 
I have yet to get my sky brightness, however the

subs were 120 seconds long

shot at f/4 at 135mm... so thats a 33.75mm aperture

ISO 1600 in a canon 550d/t2i unmodified
Thanks for the info. 120 second f/4 iso 1600 is a pretty good sky. What level from left to right was your histogram peak? From that, the sky brightness can be estimated.

I'll assume the peak was at the 1/3 histogram level. For the Samir method, which uses the 1/2 histogram level:


The 1/2 to 1/3 is a factor of 1.5 (the camera tone curve is close to linear in this brightness range), so increase your exposure time by 1.5 to 180 seconds and double again from ISO 1600 to 800, so 360 seconds (6 minutes) for mid histogram, iso 800 f/4.

On Samir's scale, 13.93+2.5*log10(360) = 20.3 mag/sq arc-sec. which is pretty good and only a half magnitude brighter than my conditions.
I processed by raw converting first then stacking in dss then editing that in photoshop.
I assume you mean the raw conversion was done in photoshop, correct?

If so, did you use lens profiles and luminance noise reduction set at a level around 20? If not, try that--it will improve.
also im very unsure how to get the sub sensor temp.i know that i could get it from the camera with magic lantern during imaging though...
Try exiftool and look for keyword Temperature.

Notes: The T2i does not have on sensor dark current suppression, or if it does, it is an early version that is not very effective. Thus, you will have some issues with dark current. That dark current is impacting your images. So measuring some dark frames at the same temperature as the light frames, sigma-clipped average those and then subtract that average from the light frames will greatly improve the result.

In your raw conversion, keep clarity and vibrance at 0 as they will create splotchiness.

Your issues appear to be mainly dark current, not sky brightness. Dark current will be better with lower temperatures coming with fall and winter. Or a newer model camera.

Dithering: not that hard. Note the drift of stars in your setup. Drift from imperfect polar alignment is already dithering in one direction. So every few frames, stop and tweak position on a direction approximately orthogonal to the drift. If your subject is small in the frame and your lens is mounted in a collar, simply rotate the lens+camera 90 degrees in the collar. Then drift is in the orthogonal direction. A couple of different positions, whether rotation or shift does pretty well as averaging out dark current variations. That combined with dark frame subtraction will improve your images a lot.

I am really impressed that at 15 you are doing so well. When I was your age (not to put any pressure on your father), my father drove me out to the country from Seattle and slept in the car while I observed. It was that encouragement, along with many great teachers, that kept my interest in astronomy and eventually my becoming a professional astronomer.

Roger
 
I have yet to get my sky brightness, however the

subs were 120 seconds long

shot at f/4 at 135mm... so thats a 33.75mm aperture

ISO 1600 in a canon 550d/t2i unmodified
Thanks for the info. 120 second f/4 iso 1600 is a pretty good sky. What level from left to right was your histogram peak? From that, the sky brightness can be estimated.

I'll assume the peak was at the 1/3 histogram level. For the Samir method, which uses the 1/2 histogram level:

http://www.pbase.com/samirkharusi/image/37608572

The 1/2 to 1/3 is a factor of 1.5 (the camera tone curve is close to linear in this brightness range), so increase your exposure time by 1.5 to 180 seconds and double again from ISO 1600 to 800, so 360 seconds (6 minutes) for mid histogram, iso 800 f/4.

On Samir's scale, 13.93+2.5*log10(360) = 20.3 mag/sq arc-sec. which is pretty good and only a half magnitude brighter than my conditions.
I processed by raw converting first then stacking in dss then editing that in photoshop.
I assume you mean the raw conversion was done in photoshop, correct?

If so, did you use lens profiles and luminance noise reduction set at a level around 20? If not, try that--it will improve.
also im very unsure how to get the sub sensor temp.i know that i could get it from the camera with magic lantern during imaging though...
Try exiftool and look for keyword Temperature.

Notes: The T2i does not have on sensor dark current suppression, or if it does, it is an early version that is not very effective. Thus, you will have some issues with dark current. That dark current is impacting your images. So measuring some dark frames at the same temperature as the light frames, sigma-clipped average those and then subtract that average from the light frames will greatly improve the result.

In your raw conversion, keep clarity and vibrance at 0 as they will create splotchiness.

Your issues appear to be mainly dark current, not sky brightness. Dark current will be better with lower temperatures coming with fall and winter. Or a newer model camera.

Dithering: not that hard. Note the drift of stars in your setup. Drift from imperfect polar alignment is already dithering in one direction. So every few frames, stop and tweak position on a direction approximately orthogonal to the drift. If your subject is small in the frame and your lens is mounted in a collar, simply rotate the lens+camera 90 degrees in the collar. Then drift is in the orthogonal direction. A couple of different positions, whether rotation or shift does pretty well as averaging out dark current variations. That combined with dark frame subtraction will improve your images a lot.

I am really impressed that at 15 you are doing so well. When I was your age (not to put any pressure on your father), my father drove me out to the country from Seattle and slept in the car while I observed. It was that encouragement, along with many great teachers, that kept my interest in astronomy and eventually my becoming a professional astronomer.

Roger
thanks roger! i really cant thank you enough for this and your encouraging words at the end. such a motivation to keep going at it!

the subs were about 1/2 histogram.

yes im applying lens profiles in the raw conversion, noise reduction as well but i was only applying color noise reduction not luminance, i was also using clarity and vibrance- good to know that they dont help.

since the t2i doesn't have dark current suppression do you think there is a way to integrate dark frames in the raw conversion? i took 100 dark frames last night and switching between the first and last frame in the set there was an extreme difference in visible noise even on the back of the camera. so it was a real demonstration that temperature makes a read difference.

on dithering... do i have to make dss aware that i have dithered my image? and how should i move the camera if i have a target in most of the frame?

thanks roger,

Judson
 
thanks roger! i really cant thank you enough for this and your encouraging words at the end. such a motivation to keep going at it!
the subs were about 1/2 histogram.
That puts the sky brightness calculation at 19.9 mag/sq arc-sec. A little brighter but still pretty good and only 0.9 magnitude brighter than my skies for the heart nebula.
yes im applying lens profiles in the raw conversion, noise reduction as well but i was only applying color noise reduction not luminance, i was also using clarity and vibrance- good to know that they dont help.

since the t2i doesn't have dark current suppression do you think there is a way to integrate dark frames in the raw conversion?
The raw conversion tone curve is linear at the low end where the dark current is an issue. First, find the dark frames with similar temperatures as your light frames.

So run the dark frames through the acr raw converter with the exact same settings as the light frames and sigma-clip average those raw converted dark frames. Do you have software to sigma clip average those frames?

You can then feed the dark frame average and the lights into DSS, or use other software to do the subtraction. I use ImagesPlus (not free).

Assuming you have software to do the sigma-clipped average, run DSS but do not use the final 32-bit stacked image. Have DSS save the aligned images and use other software that will sigma-clip average without modifying color the way DSS does--should be a simple sigma-clipped average.

What operating system are you running?
on dithering... do i have to make dss aware that i have dithered my image? and how should i move the camera if i have a target in most of the frame?
I don't think so. I have not had any problems with DSS and dithering. Certainly not if the dithering is a translate by a little. I do not remember if I had to do something special when I rotated a lot. If so, then stack separately then align and average the stacks.
thanks roger,

Judson
You are welcome.

Roger
 
the subs were about 1/2 histogram.
If your individual light frame subs were 1/2 histogram, then you might actually benefit from using shorter subs. At 1/2 histogram, you would actually be overexposed a bit. About the most you should have to go with your camera is 1/3 histogram.

There can be benefits from using shorter subs, and stacking more of them. In your case, you are probably already properly swamping read noise with photon shot noise, which means stacking more shorter subs should help you improve the quality of your data.
on dithering... do i have to make dss aware that i have dithered my image? and how should i move the camera if i have a target in most of the frame?
You should not have to do anything special for DSS. DSS as part of its full process will "register" (proper term, means align the stars in each of the images) the subs for you.

Dithering moves should only be a few pixels in both axes of the mount (RA & DEC). You will usually lose a bit of the border around the edges of the image...maybe 10-15 pixels border around all sides. It's usually not much, but because of the shifting of the frames, the data in those areas can get pretty scratchy, and you won't want to keep it.

For dark subtraction, there is another option. It has a cost...you can only get half the number of sub exposures in a given amount of imaging time. However, on warmer nights, it can be beneficial, and may even give you better data than not using it. Most Canon DSLRs from the last several generations include LENR, or Long Exposure Noise Reduction. This is a setting accessed in the camera's custom functions II panel. When enabled, it will automatically take a dark after each frame, and subtract it from that frame.

For cooler temperature imaging or cameras with lower dark current and no glows, I don't recommend using it. However, with warmer temperatures, dark current, fixed pattern noise and even amp glows to one degree or another, can be a serious problem. LENR can be an easy way to get ideally matched dark frames that will remove the more egregious pattern noise from each sub. This can increase random noise...however, random noise is something that is easy to manage with noise reduction, much easier than dealing with pattern noise.

It could be the easiest way to correct dark current in your images, and might be worth a try.

--
Catching Ancient Photons
 
Last edited:
thanks roger! i really cant thank you enough for this and your encouraging words at the end. such a motivation to keep going at it!

the subs were about 1/2 histogram.
That puts the sky brightness calculation at 19.9 mag/sq arc-sec. A little brighter but still pretty good and only 0.9 magnitude brighter than my skies for the heart nebula.
yes im applying lens profiles in the raw conversion, noise reduction as well but i was only applying color noise reduction not luminance, i was also using clarity and vibrance- good to know that they dont help.

since the t2i doesn't have dark current suppression do you think there is a way to integrate dark frames in the raw conversion?
The raw conversion tone curve is linear at the low end where the dark current is an issue. First, find the dark frames with similar temperatures as your light frames.

So run the dark frames through the acr raw converter with the exact same settings as the light frames and sigma-clip average those raw converted dark frames. Do you have software to sigma clip average those frames?

You can then feed the dark frame average and the lights into DSS, or use other software to do the subtraction. I use ImagesPlus (not free).

Assuming you have software to do the sigma-clipped average, run DSS but do not use the final 32-bit stacked image. Have DSS save the aligned images and use other software that will sigma-clip average without modifying color the way DSS does--should be a simple sigma-clipped average.

What operating system are you running?
im running windows 10. i do not have software to sigma clip average images but dss does sigma clip, should i be using that insetad of a median stack?
on dithering... do i have to make dss aware that i have dithered my image? and how should i move the camera if i have a target in most of the frame?
I don't think so. I have not had any problems with DSS and dithering. Certainly not if the dithering is a translate by a little. I do not remember if I had to do something special when I rotated a lot. If so, then stack separately then align and average the stacks.
thanks roger,

Judson
You are welcome.

Roger
 
im running windows 10. i do not have software to sigma clip average images but dss does sigma clip, should i be using that insetad of a median stack?
Yes, sigma clip average is better than median. See Stacking Methods Compared:


So you probably do not have software to do the dark frame subtractions either, correct?

Maybe someone will respond with some freeware that will do this.

An alternative, depending on your technical abilities, is the following.

Get Davinci from asu.edu: http://davinci.asu.edu/

If you can get this running (there should be a windows executable on the site--not sure about windows 10), I can give you a script to do sigma clipped average. It would also be easy to make a script for dark frame subtraction. These will be command line programs if you are OK with that.

Roger
 
im running windows 10. i do not have software to sigma clip average images but dss does sigma clip, should i be using that insetad of a median stack?
Yes, sigma clip average is better than median. See Stacking Methods Compared:

http://www.clarkvision.com/articles/image-stacking-methods/

So you probably do not have software to do the dark frame subtractions either, correct?

Maybe someone will respond with some freeware that will do this.

An alternative, depending on your technical abilities, is the following.

Get Davinci from asu.edu: http://davinci.asu.edu/

If you can get this running (there should be a windows executable on the site--not sure about windows 10), I can give you a script to do sigma clipped average. It would also be easy to make a script for dark frame subtraction. These will be command line programs if you are OK with that.

Roger
Ive never used a command line program... but if i can copy paste a line into it im sure it inst too hard.
 

Keyboard shortcuts

Back
Top