Julio
Veteran Member
I had my originals download turned off. You should be able to get it now. It was already 1600 on the long edge.
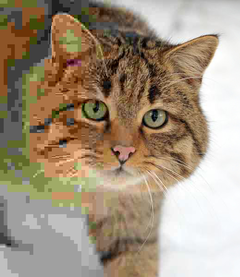
It was done in Photoshop darkened using the simple duplicate layer/multiply technique just because I hadn't done it that way for a while and it was mentioned elsewhere in this thread. I brought out the detail without using any common sharpening by increasing the tonal contrast and micro contrast.
Both things can be done in PS itself but I like using the tonal contrast in Nik's Color Efex Pro as it's much easier and very tweakable. For the microcontrast I used the, aptly named, Topaz Detail 2.
In both cases I used duplicate layers and the layer blending options to protect the highlights since that's usually where you blow detail when using these techniques.
Then I just adjusted the saturation targetted for the bark and again for the green leaves in an adjustment layer.
Collapsed everything and saved it as a jpeg. I then opened it in Lightroom just because that's where my Upload to DPReview plug-in is. I used the default downsampling to bring it down to 1600 on the long edge and no output sharpening.
It's a lot of work to get this kind of result from a jpeg but several years of looking and playing in the Digital Darkroom forum here have taught me a thing or two")
Glad you like it this way.
http://fotoman99.smugmug.com/
It was done in Photoshop darkened using the simple duplicate layer/multiply technique just because I hadn't done it that way for a while and it was mentioned elsewhere in this thread. I brought out the detail without using any common sharpening by increasing the tonal contrast and micro contrast.
Both things can be done in PS itself but I like using the tonal contrast in Nik's Color Efex Pro as it's much easier and very tweakable. For the microcontrast I used the, aptly named, Topaz Detail 2.
In both cases I used duplicate layers and the layer blending options to protect the highlights since that's usually where you blow detail when using these techniques.
Then I just adjusted the saturation targetted for the bark and again for the green leaves in an adjustment layer.
Collapsed everything and saved it as a jpeg. I then opened it in Lightroom just because that's where my Upload to DPReview plug-in is. I used the default downsampling to bring it down to 1600 on the long edge and no output sharpening.
It's a lot of work to get this kind of result from a jpeg but several years of looking and playing in the Digital Darkroom forum here have taught me a thing or two
Glad you like it this way.
--I like your work, Julio ! The sharpening that you have done looks as good (or perhaps better) than previous efforts. The high levels of color-saturation seem to work out well (where it comes the tree and it's surface in the foreground area, anyway). What software application did you use ?Julio wrote:
Perhaps the tones were not as you saw them (I prefered the bark a bit redder and more saturated) but I do believe if you look closely, you'll find more detail here:

Any chance that you could re-post the image downwardly re-sampled to a 1200 pixel width and 1600 pixel-height - so that it can be directly compared to the 1200x1600 RW2> JPG that I posted?
http://fotoman99.smugmug.com/


")