Daniel Har
Leading Member
Hi!,
I've been asked to quote the shoot of multiple passenger vehicles in various locations in the City. The importer of the brand wants pictures that reflect the car in the local environment. I have quite a bit of experience shooting cars in racing and car shows, but none in "arranged shots".
Theese won't be studio sessions, but I still understand that the official pictures of the cars that brands like VW or Ford must requier some kind of special arrangement and lighting equipment that I may not have. I also understand that I may not be able to achieve such a level of quality since it requieres experience in this kind of work. But, I'm willing to do some tests first by my own and present the result to the client in advance.
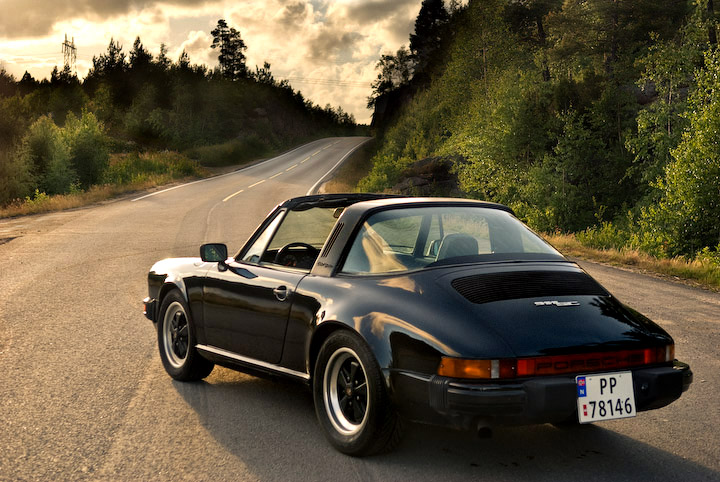
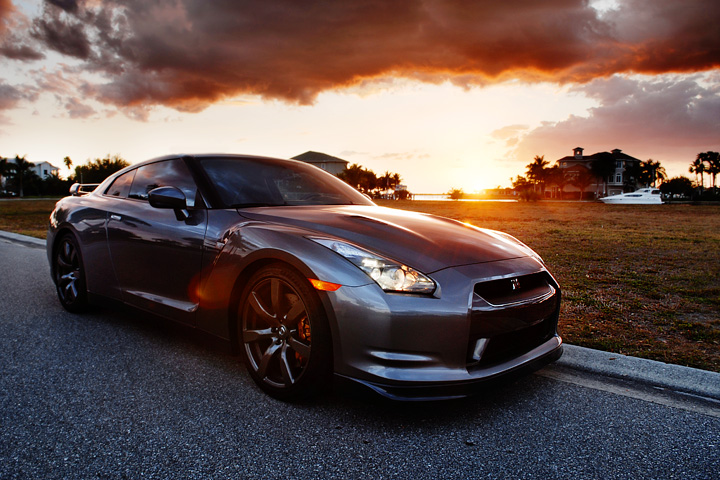
Anyone here have any idea of the kind of setups needed? Take for instance this picture. It seems to me that the sunset is lighting the back of the car, but the front and side reflections are very well done and smooth. Is this a result of photoshop, artificial lighting... etc?

I've been asked to quote the shoot of multiple passenger vehicles in various locations in the City. The importer of the brand wants pictures that reflect the car in the local environment. I have quite a bit of experience shooting cars in racing and car shows, but none in "arranged shots".
Theese won't be studio sessions, but I still understand that the official pictures of the cars that brands like VW or Ford must requier some kind of special arrangement and lighting equipment that I may not have. I also understand that I may not be able to achieve such a level of quality since it requieres experience in this kind of work. But, I'm willing to do some tests first by my own and present the result to the client in advance.
Anyone here have any idea of the kind of setups needed? Take for instance this picture. It seems to me that the sunset is lighting the back of the car, but the front and side reflections are very well done and smooth. Is this a result of photoshop, artificial lighting... etc?


")


")