Panorama Software

JV Price

Member
Messages
49
Reaction score
2
Location
Austin, TX, US
I hate it when I jump out to try other software to do a certain task. I usually get confused and can't decide which one I like the best. Then I search for forum opinions only to get more confused. Finally, my computer ends up "clogged" with software I forget about having. Such is the life of a software junkie.

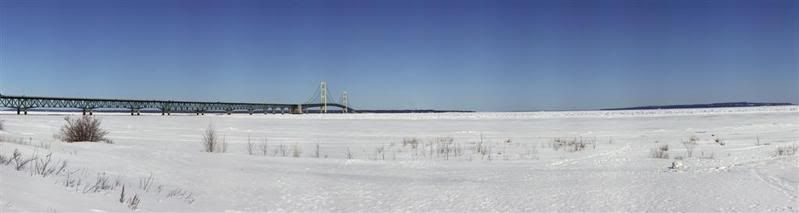
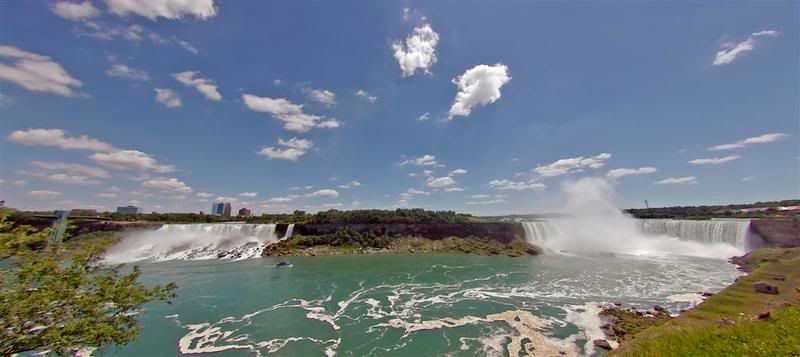
For a number of years I have always used Canon photostitch to do my merging. Then for some reason I thought I needed to try Adobe Elements 6. Finally I read here that PTGui was an excellent software to use. I learned from this forum yesterday that vertical shots for panoramas are the way to go. So I went outside and shot vertically -- loved the result.

Photostitch was as straight forward as ever. Fast, easy, but possibly not the best product. Elements seemed to take forever to process. I waited and waited and waited for processing to complete. I'm not familiar with that software, maybe I left too much for it to perform automatically, I don't know. But there was nothing about that test that made me want to use elements again for photomerging panoramas. Anyone out there like Adobe Element over other tools?

PTGui may become my favorite. On the downside, it made me work harder. I was busy deleting parts of the image that did not add to the product but possibly confused the calculation, affecting the final result. I spent time twisting and rotating to get the best presentation. I like the final product -- I was proud -- but it's not a quick process.

Now I have to decide whether to let the simple approach of Photostitch do the work, or maybe I should work hard, learn, and become more efficient in PTGui.

On the other hand, is there some other tool out there to make a non-professional enthusiast happy with his products?
 
On the other hand, is there some other tool out there to make a
non-professional enthusiast happy with his products?
I'm quite happy with PanoramaStudio ( http://www.tshsoft.de/en/index.html ).

It's a small and inexpensive tool that's already doing a good job in automatic panorama stitching. And you still have several options to manually work on the details for critical images.

A demo version is available on the webpage.

Only feature I'm missing so far is the support of panoramas with tiles in x and y direction. For the moment PanoramaStudio only supports horizontal panoramas (or only vertical, if you turn all images). So you would have to stitch all photos of one line first and then stitch these "1D panoramas" to a "2D panorama".
 
PTGui is my strong favorite. While it isn't as automatic as others, it will frequently give you good results when PSE or PSCS3 fails. The Photoshop stitching software is very slow and it doesn't have much configurability.

PTGui is fairly quick and easy once you get the hang of it. I use the batch stitcher to queue-up jobs and then walk away while it works. If you set the batch stitcher to background priority, you can work with the GUI and with Photoshop while stitching.

Another very helpful part of PTGui is that it provides layered images. This is useful so that you can manually blend layers where necessary. An example might be where the stitcher clips off half of a car. In this case, you go in and either add the other half of the car back in or you delete the car entirely. PS doesn't offer this option.

HDR is not easy with PS or PSE. PTGui does HDR output so when you get more advanced you can handle more complicated images. The reason that HDR is so helpful for panoramics is that frequently your image is so wide that in one part of the image, the sky is dark and in the other part of the image, the sky is completely blown out/overexposed. HDR allows you to control for this in a systematic way.

Take the dive and learn the proper tools. With PTGui and PSE, you will have a very powerful toolset.

--
Fike, Trailpixie, or Marc
http://www.trailpixie.net
http://www.marcshaffer.net
 
I like Autostitch a lot.

It's free, straightforward and gives good results.
You can have a look a it here

http://www.autostitch.net

--
Claude Carrier
 
for panorama software PTGuiPro is the one to get. it just plain betteer than the rest and has far more capability. it has more major drawback:price.

To do panoramas-

for panoramas- -use tripod. you must keep it level with the horizon. if your tripod does not have a level builtin then buy one that slides into your flash hotshoe. again make a max effort to get the camera level.

-for exposure. set the exposure by pressing halfway and noting the fstop and shutter speed. you are trying to find the brightest part of you panorama scene to be. once you have found the brightest check the fstop and shutter speed. put camera into manual metering mode and use those settings. do not change them for any part of the panorama.

-lens selection. i shoot mine with a 20mm. note: SHOOT THE LENS VERTICALLY. this is the only way to get some vertical scene, otherwise the panorama will be shaped like a hotdog. Note- if the panorama is a vertical panorama then you shoot landscape. this is why i went to a 20mm. in vertical you are cutting your angle of view way down. my tripod has degrees engraved in the mount, i was shooting at only a 15 degree spread and in looking at the shots before stitching there wasn't that much overlap. i later shot panoramas with 35mm 50mm 70mm; the hot dog effect was more pronounced. the panorama itself did work. With higher mm lens you would have to go to double rows.

-determine in advance the center point of the scene and try to go X number of shots on each side of it. for me with my setup a 120 degree scene is 7 shots; the center and 3 on each side. if i go with a 35mm lens then a 120degree scene will take 13 shots. no matter what lens you use realize that you are adding only 33% new scene with every shot, the rest is overlap for the right and left adjoining shots. the only exceptions are the end shots in the whole scene. it is possible to add another row above and/or below the first one. this would help the vertical look especially if you are using a 50mm or longer. for multiple rows are the same as 1 row, but you know have to overlap on the vertical as well as the horizontal. you must make sure that there are no gaps.
  • i stick my hand in front of the lens and shoot, then shoot the panorama, the 7 shots, then put hand in front of lens and shoot. later i know that everything between hands is the panorama.
-i have used cs2 or the panorama factory software to make the panorama. for either couldn't be simpler simply select the shots and it does the work. this is where using a level pays off. the software is leveling the scene to make the long rectangle, but if the scene was not as level as possible in the first place the vertical becomes less and less(you end up with hotdog shape). so having the tripod and camera level is very important. also when mount and shooting vertically make sure the camera really is vertical, carefully check by looking threw the viewfinder. some tripod vertical adjustments actually go past true vertical, mine does even though it says 90 degrees.
-be sure to use a cable release or the selftimer.

-on focusing- what i do is to simply preset the 20mm lems at infinity, because of depth of field everything from 5.64ft to infinity is in focus at f11.0 distance 200ft. you can also use a hyperfocal focus setup. but thanks to the DOF table, just setting the lens at infinity is simpler. -i left WB alone, that is set at AWB; or you can use a preset setting like sunny or cloudy, but once set do not change it till panorama shots are done.

-online depth of field calculator available here- http://www.dofmaster.com/dofjs.html

-parallax error. It is usually not so much a problem outdoor shooting. This is because the distances are greater than inside. In any event if you shoot panoramas outside and at short distances OR any inside any building, you should be thinking of getting a panorama tripod head. This is to eliminate parallax error. I have the panosaurus pano head, cheap durable, and it works.

-for panoramas, the software i use is either panorama factory orPTGui or cs2. the one that works best for me is PTGui. i have since gotton PTGuiPRO, expensive but worth it. has many features and abilities that the other software does not have, including the ability to process 360 and 720degree spherical panoramas, plus many projection types and it does raw and hdr panos.

-on post shooting work. If jpeg DO NOT PP. just use as is. After the pano is made then pp as desired. If raw, does your panorama software do raws? Not all do. If yes raw batch convert only. Do not adjust any 1 shot. All shots must be the same before the pano is made, then do any pp you wish but on the whole pano.

If any pp work is done to the pano before stitching then there will be a difference in the sections, and you could(probably?) get vertical bands where the sections join.
Any questions, please ask. gary
 
QTVR=QuickTime Virtual Reality

i have made some QTVR for my own use and showing to my relatives and friends. On my pc. Use google for QTVR and you will get websites that have MANY MANY QTVRS to see. They can be seen using Quicktime 7.x or later.

it is really not a problem if you happen to have the right gear. i use a 6mp dslr, the panasaurus panorama head, a tripod, cable release, and a sigma 12-24mm zoom at the 12mm setting. (i already have my lenses calibrated to be used on the nodal point. i know the numbers, just dial them in). for the QTVR i make 2 complete circles, of 12 shots each, each with the pano head tilted up 30degrees and tilted down 30degrees. except for a very small black circle at the top and bottom, it is is a 720degree spherical panorama. in the future i am thinking of getting the 8mm sigma or the 10-17pentax lens. this would eliminate the black circles. once setup the shooting takes maybe 10-15minutes.

prior to running in the software, i batch process the images, jpegs, in pe6. i use auto level, auto contrast and auto sharpening. once in PTGuiPro they are rotated right side up as a group.

it is then run in PTGuiPro7.8 software to make the finished result. the software runs about an hour or a little less to make the circular image, the QTVR. It is saved as a special format in a folder, and can be viewed in Quicktime 7.x or later. The quicktime 7.x or later can turn the image in a circle or move it vertically.

note hdr QTVR are possible but then you would be shooting multiple exposures of each frame. PTGuiPro will make them. there may be other software that does, but PTGuiPro is the only one that i know that does.
 
QTVR=QuickTime Virtual Reality
i have made some QTVR for my own use and showing to my relatives and
friends. On my pc. Use google for QTVR and you will get websites that
have MANY MANY QTVRS to see. They can be seen using Quicktime 7.x or
later.

it is really not a problem if you happen to have the right gear. i
use a 6mp dslr, the panasaurus panorama head, a tripod, cable
release, and a sigma 12-24mm zoom at the 12mm setting. (i already
have my lenses calibrated to be used on the nodal point. i know the
numbers, just dial them in). for the QTVR i make 2 complete circles,
of 12 shots each, each with the pano head tilted up 30degrees and
tilted down 30degrees. except for a very small black circle at the
top and bottom, it is is a 720degree spherical panorama. in the
future i am thinking of getting the 8mm sigma or the 10-17pentax
lens. this would eliminate the black circles. once setup the shooting
takes maybe 10-15minutes.
prior to running in the software, i batch process the images, jpegs,
in pe6. i use auto level, auto contrast and auto sharpening. once in
PTGuiPro they are rotated right side up as a group.
it is then run in PTGuiPro7.8 software to make the finished result.
the software runs about an hour or a little less to make the circular
image, the QTVR. It is saved as a special format in a folder, and can
be viewed in Quicktime 7.x or later. The quicktime 7.x or later can
turn the image in a circle or move it vertically.

note hdr QTVR are possible but then you would be shooting multiple
exposures of each frame. PTGuiPro will make them. there may be other
software that does, but PTGuiPro is the only one that i know that
does.
Gary, I have (occasionally) used PTGUI for 5 years (not the pro version) and I have recently gotten back in the joy of making Panos. I plan to get an upgrade version soon -- perhaps the Pro version but I need to do some research regarding the difference which I am sure will be documented on their site.

I use a Pano Head I build (with leveling bubbles) for use either Vertical or Horizontal, along with a sturdy tripod. I plan to either purchase (or build) a pano head leveler since it would be very helpful as compared to adjusting the tripod legs for full 360 degree leveling. I am NOT too lazy to do this, instead; it requires me quite a length of time to get "perfectly" level especially when on unlevel ground.

I usually use only Vertical for a "taller" pano. I have made several "single row" Panos both outside and inside our home. These have resulted in very good results.

My question is regarding multi row pano settings: As an example, let's consider a dual row pano. Do the upper row images have to be exposed with the same "EXACT" overlap as was used for the lower row exposures.

Currently, I do not use the normal "degree click stops" for uniform overlay between EACH image. I have been using adequate overlap but have determined where to start the next image based on the previously exposed image. I have had NO issues using this method for the Single row pianos but this method may not be so successful for multi-row panos. I expect with your experience, you will know and be able to advise me.
Thanks for your help.
--
Vernon...
 
My question is regarding multi row pano settings: As an example, let's consider a dual row pano. Do the upper row images have to be exposed with the same "EXACT" overlap as was used for the lower row exposures.

Currently, I do not use the normal "degree click stops" for uniform overlay between EACH image. I have been using adequate overlap but have determined where to start the next image based on the previously exposed image. I have had NO issues using this method for the Single row pianos but this method may not be so successful for multi-row panos. I expect with your experience, you will know and be able to advise me.
============

my panosaurus does not have click stops. i simply for each lens i use for panos take a vertical target such as any pole or my wife and just pan left to right with the target starting at the edge. then i simply note what it takes in degrees to get 1/3 image movement, that gives me my 33% overlap(with a 120degree pano and a 20mm lens this 7 shots; with a 35-50mm lens this 13 shots; and with the 70mm this is 28 shots. with the 12-24mm zoom using the 12 position i take 3 shots for a 120degree pano. all shots in portrait mode.). as for the horizontal panos making multiple rows. for a 2 row pano i simply move the tilt down about a 1/3 of the image, note the position on the subject, then when it comes time to make the second row that spot is the bottom of the top row. no higher math or nulclear physics involved, i am trying to do this for fun and a hobby.

this image is actually 2 shots one above the other. i simply tilted on the bridge towers till i had moved a 1/3 of the image and noted where on the tower that was, took the shot, then tilted up to put the edge of the other shot at the 1/3 mark(this gives 2/3 new material), and shot again. used PTGuiPro to put them together.


my favorite. 28shot pano, 14 in each of 2 rows, 120degrees, use 70mm lens. 14231x3839 pixels or somethinglike a 55mb sensor. on the rprint or my monitor the detail is incredable. it is printed at 12x45inches. the overlap is 33% both horizontally and vertically. took a little under an hour to shoot. taken 3/15/2008 about 25degress F.


you can also make some lazy panos of very wide fov simply by using a fisheye lens then defishing. below is aboiut a 170degree, single shot taken with the pentax 10-17mm fisheye at the 10 setting then defished with PTLens. by the way, if you do it once in PTLens that program remembers the setting you just used and the next one is automatic. as long as ytou do not do a different lens.


lastly, if you are envious of the super high megapixel dslr, do not rush out to buy one you already got it, at least for static scenes. simply make a small pano that is a 1x4 image or a 2x4 image. then multiply out to get the pixels size, it is huge at 33% overlap. a 1x4 taken inportrait mode is 3000pixels high. the normal frame for a 6mp dslr, me, is 2000x3000. to end up with the same 2:3 ratio. this is for a 6mp dslr. you get at 33% overlap is 3000x4705 pixels or 14.1mps. if 2 rows high and a 2:3 ratio is 3990x6116pixels or 24.4mps. this last is the same as the biggest and newest dslr currently out. and you get the same resolution.
 
My question is regarding multi row pano settings: As an example,
let's consider a dual row pano. Do the upper row images have to be
exposed with the same "EXACT" overlap as was used for the lower row
exposures.

Currently, I do not use the normal "degree click stops" for uniform
overlay between EACH image. I have been using adequate overlap but
have determined where to start the next image based on the previously
exposed image. I have had NO issues using this method for the Single
row pianos but this method may not be so successful for multi-row
panos. I expect with your experience, you will know and be able to
advise me.
============
my panosaurus does not have click stops. i simply for each lens i use
for panos take a vertical target such as any pole or my wife and just
pan left to right with the target starting at the edge. then i simply
note what it takes in degrees to get 1/3 image movement, that gives
me my 33% overlap(with a 120degree pano and a 20mm lens this 7 shots;
with a 35-50mm lens this 13 shots; and with the 70mm this is 28
shots. with the 12-24mm zoom using the 12 position i take 3 shots for
a 120degree pano. all shots in portrait mode.). as for the horizontal
panos making multiple rows. for a 2 row pano i simply move the tilt
down about a 1/3 of the image, note the position on the subject, then
when it comes time to make the second row that spot is the bottom of
the top row. no higher math or nulclear physics involved, i am trying
to do this for fun and a hobby.
this image is actually 2 shots one above the other. i simply tilted
on the bridge towers till i had moved a 1/3 of the image and noted
where on the tower that was, took the shot, then tilted up to put the
edge of the other shot at the 1/3 mark(this gives 2/3 new material),
and shot again. used PTGuiPro to put them together.


my favorite. 28shot pano, 14 in each of 2 rows, 120degrees, use 70mm
lens. 14231x3839 pixels or somethinglike a 55mb sensor. on the rprint
or my monitor the detail is incredable. it is printed at 12x45inches.
the overlap is 33% both horizontally and vertically. took a little
under an hour to shoot. taken 3/15/2008 about 25degress F.


you can also make some lazy panos of very wide fov simply by using a
fisheye lens then defishing. below is aboiut a 170degree, single
shot taken with the pentax 10-17mm fisheye at the 10 setting then
defished with PTLens. by the way, if you do it once in PTLens that
program remembers the setting you just used and the next one is
automatic. as long as ytou do not do a different lens.


lastly, if you are envious of the super high megapixel dslr, do not
rush out to buy one you already got it, at least for static scenes.
simply make a small pano that is a 1x4 image or a 2x4 image. then
multiply out to get the pixels size, it is huge at 33% overlap. a 1x4
taken inportrait mode is 3000pixels high. the normal frame for a 6mp
dslr, me, is 2000x3000. to end up with the same 2:3 ratio. this is
for a 6mp dslr. you get at 33% overlap is 3000x4705 pixels or
14.1mps. if 2 rows high and a 2:3 ratio is 3990x6116pixels or
24.4mps. this last is the same as the biggest and newest dslr
currently out. and you get the same resolution.
Gary, I really appreciate the detailed descriptions as well as the illustrative panos. I fully agree that I like this to be a hobby (not work) and at the same time to get good results.

It is good to know and what I had hoped that the software will use the "points" within the images to do the proper match for assembling the various images even for multi row panos. PTGUI is for me "fun software and a pleasure to use" and a joy to view the final results.

I like your panos. We have several Niagara Falls images that were exposed just as "single images" when my Wife and I were there on our 26'th Wedding Anniversary. That was 30 years ago. We enjoyed the week we were there and hopefully we will get to go back before our 60'th.
Gary, thanks again....
--
Vernon...
 

Keyboard shortcuts

Back
Top